WebWisdom NT
Database for Distance Learning
|

Department of Information Technology
Academy of Economics
Mansfelda 4
60-854 Poznan, Poland
tel. (48)(61) 848-05-49
fax (48)(61) 8483840
|

Northeast Parallel Architectures
Center
111 College Place
Syracuse University
Syracuse, N.Y. 13244-4100
tel. (315) 443-1722
fax (315) 443-1973
|
April 1998
Table of contents
1. Introduction
2. System architecture
3. Logging to the database, Maintenance Tools
3.1. Logging to the database
3.2. Administrating the database
3.2.1. Changing database connection parameters
3.2.2. Incorporating images into the database
3.2.3. Administrating users
3.3. Changing default user’s properties
4. Foilworld Manager
4.1. Creating foilworld
4.2. Deleting foilworld
4.3. Setting foilworld properties
4.4. Granting privileges to foilworld
4.5. Setting up foilworld owner
4.6. Moving foilworld to another place in the hierarchy
5. Presentation Manager
5.1. Editing existing presentation
5.2. Copying presentation to another foilworld
5.3. Moving presentation to another foilworld
5.4. Deleting presentation
5.5. Filtering presentations and their foils
6. Importer
6.1. Importing original PowerPoint presentations
6.1.1. Phase 1 - copying PowerPoint presentation in HTML format to temporary directory
6.1.2. Phase 2 - incorporating contents of the temporary directory to the database
6.2. Importing RTF-based PowerPoint presentations
6.2.1. Configuration utility
6.2.2. Phase 1 - copying PowerPoint presentation in HTML format to temporary directory
6.2.3. Phase 2 - generating RTF outline of the presentation
6.2.4. Phase 3 - compiling RTF outline and enriching HTML files
6.2.5. Phase 4 - incorporating HTML files to the database
6.3. Importing WebWisdom v.1.0 presentations
6.3.1. Phase 1 - copying WebWisdom 1.0 presentation to temporary directory
6.3.2. Phase 2 - compiling WebWisdom 1.0 presentation to HTML format
6.3.3. Phase 3 - incorporating contents of the temporary directory to the database
7. Exporter
8. Technical notes
8.1. Installation of the WebWisdom NT system
8.1.1. Creation of Oracle’s user account
8.1.2. Creation of database schema
8.1.3. Initial database filling
8.1.4. Installation of WebWisdom Manager
8.1.5. Installation and configuration of Netscape Enterprise Server
8.1.6. Installation and configuration of the Exporter (templates)
8.2. Application Programming Interface API for the Exporter
8.2.1. Object declarations
8.2.2. Property retrieval functions
8.2.3. Authorization functions
8.2.4. Image manipulation functions
8.2.5. Foilworld manipulation functions
8.2.6. Presentation manipulation functions
8.2.7. Font manipulation functions
8.2.8. Help manipulation functions
8.2.9. State preservation functions
8.2.10. Other functions
8.3. Database schema
Appendix A. Database Schema
1. Introduction
Public, mass education becomes nowadays one of the important issues, not only for schools and universities, but also for companies and their continuous education programs. The education process should be as cheap as possible, as effective as possible, and as fast as possible. As it is widely known, with standard teaching techniques it is not possible to teach a large group of people effectively, fast and cheap. Moreover, as teaching material evolves, the teachers must continuously learn a lot.
A solution to this problem can be distance teaching, by the use of Internet and its modern technologies. To this goal, on one hand effective synchronous network transmission and end-user graphical user interfaces must be provided. On the other hand, as the teaching material keeps growing, becomes more and more complicated and user interfaces become more multimedia oriented, a key issue of a distance teaching system becomes a data repository. Such repository must guarantee efficient storage of various types of data, multi-user access for authoring and retrieval, possibility to define user access privileges, ease of preparation of new courses, which employ old and new educational material.
Usually, teaching material in the repository is divided into presentations. A presentation is an ordered set of foils followed by a description. There are two kinds of descriptions: a global one - for all the foils (author name, presentation goals, keywords, abstract, purpose, etc.), and a local one - separately for each foil (title, contents, header and footer, etc.). A foil could be: an image (of any type), an unformatted text (plain text or in HTML format), formatted text (list of bullets and/or points), a program (e.g., an applet), etc.
Key issues which should be fulfilled by a modern system for preparing and displaying presentations for courses and classes are the following:
- preparing presentations in an efficient way, with full graphical user interface, formatting wizards, support for templates, cliparts, icons, etc.,
- displaying prepared presentations locally and remotely, by the use of intranet and Internet,
- reusing and editing previously prepared presentations,
- creating a directory (hierarchy) of presentations,
- search tools,
- storing presentations in one place and in a unified form,
- storing presentation meta-data, i.e., author name, creation and last modification dates, purpose, keywords, etc.,
- storing additional data for presentations: add-ons (i.e., addresses of repositories with additional information about presented topics), sounds, programs, applets, examples, etc.
Only the first requirement is fulfilled by existing systems, to mention for example Microsoft PowerPoint application, CorelDraw!, and Lotus Notes. The other issues mentioned above, however, up to now were not fully fulfilled by any existing software. The new WebWisdom system meets these requirements. The key characteristics of the system are the following:
- use of an object-relational database as a repository for presentations,
- importing presentations prepared by any presentation-editing tool, for example Microsoft PowerPoint,
- use of sets of images and/or texts prepared by any image- or text-processing tool (scanned pictures, formatted texts, text&graphics documents, HTML documents),
- use of programs written in any programming language, Java applets, interactive examples, etc.,
- consistent and unified presentation storage, regardless of the presentation type presentation, its structure, editing tool, etc.,
- presentation meta-data storage (author name, creation date, keywords, abstract, modification history, use history, formatting and presentation attributes, general purpose, etc.),
- storage of some additional information for presentations: add-ons (lists of identifiers/addresses of Internet resources) and sounds,
- copying, moving, editing, renaming, and deleting presentations,
- composing presentation on the base of other presentations or their parts,
- managing sets of presentations by a hierarchy of folders called foilworlds,
- managing users and user privileges,
- enabling different methods of displaying presentations by the use of templates,
- exporting (i.e., displaying) presentations locally and remotely (by the use of Internet) in a form described by a given template,
- extensibility - possibility to define new templates with new attributes which will be stored in existing data structures.
The system described in this document is a result of a common project of Department of Information Technology of Academy of Economics at Poznan, Poland, and NPAC (Northeast Parallel Architecture Center) at Syracuse University, Syracuse, USA. This project is a continuation of "WebWisdom" project developed during last few years at NPAC. Main advantages of the described
WebWisdom NT are the following: scaleable database-oriented repository for foils and presentations, uniform internal data format, multi-user access for teaching material preparation, user-defined templates for displaying presentations, extendible hierarchy of foilworlds and presentations, users’ access rights and privileges, extended meta-data for presentations and users, tools for managing presentations, foilworlds, users, meta-data, etc., and full graphical user interface.
2. System architecture
The
WebWisdom NT system is developed around object-relational database ORACLE v. 7. The following technologies are used:
- preparing presentations by the use of presentation-editing tool Microsoft PowerPoint or (in a limited manner) any text- or image-processing tool, i.e. Microsoft WORD, CorelDraw!, Adobe PhotoShop, etc.,
- importing presentations to the database in HTML/GIF/JPEG (HyperText Markup Language / Graphical Input Format / Joint Photographic Expert Group) or RTF/PowerPoint (Reach Text Format for Microsoft PowerPoint) formats; most of popular presentation-editing tools have a possibility to export presentations in at least the first format,
- displaying presentations by the use of any HTML browser (e.g., Netscape Communicator, Microsoft Internet Explorer),
- remote access to the database by the use of Internet,
- dynamic HTML page creation (by the use of Netscape LiveWire technology).
The architecture of the
WebWisdom NT system is presented in Fig. 2.1. The system is composed of five main parts:
- database (repository),
- presentation manager,
- maintenance tools,
- importer with filters for PowerPoint, RTF and WebWisdom 1.0 presentations,
- exporter with templates.
The database is the core of the system. It is responsible for:
- storing foils (with contents: image, text, HTML text, applet, etc.),
- storing presentations (ordered set of foils and/or other presentations),
- storing foilworlds (hierarchy of presentations and/or other foilworlds),
- storing add-ons (URLs with additional information for a foil),
- storing sounds (as sequences of bytes in any known sound format) for individual foils or whole presentations,
- storing applets, images, and other forms of binary data (as sequences of bytes in a given format),
- storing source files for foils (e.g., PowerPoint files *.ppt),
- storing formatting parameters (preferred image size, type, location, colors, font sizes, etc.),
- storing information about users (name, identifier, password, access rights, etc.),
- checking user privileges while accessing presentations and foilworlds,
- providing efficient access for writing, updating, and reading foilworlds and presentations, as well as their parts.

Fig. 2.1. Global architecture of
WebWisdom NT system
The Managers are responsible for:
- Foilword Manager: managing hierarchy of foilworlds: creating a foilworld, copying a foilworld to another place in the hierarchy, moving a foilworld inside the hierarchy, renaming a foilworld, deleting an empty foilworld, setting an owner of a foilword,
- Presentation Manager: managing presentations being components of foilworlds: creating presentations from parts of other presentations (compose presentation), creating a presentation from newly imported data, copying elements of a presentation to another one, renaming a presentation, deleting a presentation,
- granting access rights to foilworlds and presentations to other users,
- editing meta-data for presentations and their parts (sub-presentations and individual foils), setting and editing properties for users, foilworlds and presentations.
The Managers is equipped with easy-to-use graphical user interfaces.
The Maintenance Tools are used for:
- creating and managing users,
- loading images used for backgrounds and icons.
These tools are also equipped with graphical user interface. They are closely integrated with presentation manager and its user interface.
The Importer (Presentation Loader) is used for:
- importing a new presentation from PowerPoint format by the use of:
- directory with files being a result of HTML conversion of PowerPoint format; these files are the following: images sldNNN.gif, imgNNN.gif, sldNNN.jpg, or imgNNN.jpg, and HTML files sldNNN.htm and tsldNNN.htm, where NNN=000..999 are foil numbers; if a source *.ppt file is present in the directory, it is also taken into consideration and put to the database as the presentation source;
- as above, but also with an outline of a presentation in RTF format; a special filter is used to process RTF outline to enrich *.htm files (generated originally by HTML conversion) by formatting parameters: colors, font sizes, margins, font names, font families, national characters, etc.; during filtering some database-specific properties can be also added: backgrounds, link colors, signature, abstract, etc., as well as sound files and add-on information for foils; these properties may be defined by the use of a configuration utility equipped with a full graphical user interface,
- importing a new presentation from WebWisdom 1.0 presentation by the use of special filter; the generated output is similar to processed HTML/RTF files mentioned above,
- setting up parameters for the presentation being imported and its foils: author, date, default colors and fonts, signature, add-on, sound, etc.
The Exporter is used for displaying a presentation by the use of Internet/intranet and standard HTML browser (e.g., Netscape Communicator or Microsoft Internet Explorer). The succeeding foils of the presentation are read from the database and being formatted by user-defined templates. During database access, a template may take into consideration the formatting attributes stored in the database (colors, fonts, images and/or text versions, signatures, add-ons, sounds, etc.).
In the next chapters the Foilword Manager, the Presentation Manager, the Maintenance Tools, the Importer and the Exporter are presented in details.
3. Logging to the database, Maintenance Tools
The
WebWisdom NT main editing application is written in Java as a stand-alone applet. The applet is invoked by special script which: (1) sets environment variables, and (2) launches Java appletviewer command with appropriate HTML file. The contents of a sample invocation script is presented in Fig. 3.1 (DOS version, file "run.bat") and Fig. 3.2 (UNIX version, file "run").
|
SET ENV=2000
SET CLASSPATH=.;..\classes111.zip;..\symbeans.jar;..\sym\classes.zip;..\sym\symclass.zip
SET PATH=%PATH;.\pm\r2h
appletviewer run.html |
Fig. 3.1. Invocation script for the presentation manager, DOS version
|
setenv CLASSPATH .:../classes111.zip:../symbeans.jar
setenv PATH $PATH:./pm/r2h
/usr/java/bin/appletviewer run.html |
Fig. 3.2. Invocation script for the presentation manager, UNIX (t)csh version
After the invocation, the system opens its main window (Fig. 3.3) and waits for user interaction.

Fig. 3.3. Main window of the
WebWisdom NT system, no user is logged-in
3.1. Logging to the database
To work with the database, a user must first log-in to the system by pressing "Login" button. Pressing "Exit" button at any time finishes connection with the database and exits to the operating system, automatically closing the window. Until the user logs-in correctly, all buttons (except "Login" and "Exit" buttons) in the main window (cf. Fig. 3.3) are disabled. After a successful log-in all buttons become enabled. A special case is "root" user. After successful log-in as "root" user more buttons appear in the main window, enabling to perform some maintenance tasks.
To log-in to the system a user must press "Login" button in the main window. As a result, a new window called "Login window" appears (Fig. 3.4). The user must enter his/her name and current password in the "user name" and "password" fields, respectively. The password does not appear directly on the screen, instead it is marked by the use of ‘*’ characters. After fixing the name and the password, the user can press "Connect" button to connect to the database. To exit the login window at any time, the user can press "Cancel button". In such case, however, he is not connected to the database and he cannot use the Managers or the Presentation Loader in any form.

Fig. 3.4. Login window of the
WebWisdom NT system
In the middle part of the window current log-in configuration is displayed. Four fields are provided: "Database name", "Driver name", "Host name" and "Port No". These fields can be used to enter: database name, driver name used to connect to the database from Java applet (default: "jdbc:oracle:thin"), DNS host name where Oracle database server is running, and the port number the applet uses to communicate with the database (default: "1521"). User can change value of any of these fields and connect with these new values. To this goal four additional buttons are provided. By the use of "Clear" button a user can erase the current contents of these fields, while by the use of "Get defaults" button – he/she can restore the current default values for all the fields. By filling the fields with new values and pressing "Set default" button a user can store new current default parameters. The "Root" button is used to administrate the connection with the database management system. The meaning of this button is explained in the next section. This function is reserved only for the database administrator (cf. next section).
In the lower part of the window there is a sub-window where system messages are written. The messages concern errors while accessing the database. The most common messages are "Wrong user name/password", "Not suitable driver", "This configuration will be used as the default one", and "Connection refused", which are self-explained.
3.2. Administrating the database
There is one special user ("root") who is the system administrator. This user has privileges to create new users, change their basic properties (including passwords and log-in names), and change owners of all foilworlds. After this user is logged, the main window is extended by some additional buttons. Their meaning is explained in the succeeding sections.
3.2.1. Changing database connection parameters
While the log-in window is open (cf. Fig. 3.4), and the "root" user name and password is properly set, one can administrate the database connection by pressing "Root" button. As a result, a new window appears where the administrator may set new name and password for the database user that is used to connect to the database. This special user is not visible for the WebWisdom users, and its name and password are known to the administrator only.
Please note that the root user password is verified in the database. If for some reason the database is not accessible (e.g. after entering wrong database user name or password or shutting down the database), the root’s password cannot be verified and database user or password cannot be corrected. In such case the administrator can change the database user and/or password by logging in as "admin" user. The "admin" user is a local user and system does not have to connect to the database to verify it. Only a person responsible for WebWisdom maintenance knows the "admin" user password.

Fig. 3.5. Setting special user to connect to the database
3.2.2. Incorporating images into the database
After the "root" user performs successfully log-in and the log-in window is closed, the new buttons "Images" and "Users" appear in the main window (Fig. 3.6). With these buttons the "root" user can add images (for backgrounds, buttons, etc.), and administrate WebWisdom users , respectively.

Fig. 3.6. Main window of the
WebWisdom NT system after "root" log-in
After pressing "Images" button, a new window appears (Fig. 3.7), which enable reading images into the database. These images will be used by the Exporter (templates) as backgrounds, buttons, icons, etc. The window is composed of two parts. In the left-upper part of the window a user can navigate in the file system. By double-clicking on an image file name a user can display the contents of this file in the right-upper part of the window. Both JPEG and GIF file formats are accepted. The same action can be performed after selecting a file name and pressing "Show" button. If the selected file is not a picture in any known format, nothing is displayed. A user can also manually enter a path to a directory in a field located in the left-down corner of the window. After pressing "Open" button the contents of the directory pointed by the written path will be displayed in the left-upper part of the window.

Fig. 3.7. Window for incorporating images into the database
By pressing "Scale" button a user can scale the selected image to either its normal size or the size of the image display field.
In the right-down part of the window, in the field named "Image Name", a user can set a name of the image in the database. By default, this name is equal to the selected file name, ".gif" and ".jpg" extensions are not required although can be used. By pressing "Store" button the image is loaded to the database. If the name is already in use, i.e., another image has been stored already under the same name, a message appears and the image is not stored.
By pressing "Help" button a user can display a WWW-navigator window with a description of the "Images" window and possible actions.
By pressing "Exit" button a user can go back to the main window. Since that point all the selected and stored images are accessible for the exporter and may be used as icons, buttons, backgrounds, etc.
3.2.3. Administrating users
After pressing "Users" button in the main window (cf. Fig. 3.6), a new window enabling change of basic user’s properties appears (Fig. 3.8). To create a new user, administrator must select "<NEW USER>" option in the selector on top of the window and fill in all fields with log-in name, password, and expiration date (the date user’s account becomes no longer valid). After completing the fields and pressing "Add/Modify" button, new user’s account is created in the database.

Fig. 3.8. Window for administrating users of the
WebWisdom NT system
To edit basic properties of an already existing user’s account, the user’s name must be chosen by the use of the same selector on top of the window. The current properties of the user’s account appear in the window fields (Fig. 3.9). Now, all of the attributes can be changed (contents of "Password" and "Confirm password" fields must be equal). After entering new attribute values, the user’s account can be updated by pressing "Add/Modify" button. After pressing "Drop" button, the currently selected user’s account is deleted from the database. Only users who do not have ownership of any database objects (foilwords, presentations, etc.) can be deleted. If a user is an owner of at least one foilworld or one presentation, his account cannot be deleted and a message appears on screen informing that the account still exists.

Fig. 3.9. Editing existing user’s accounts
By pressing "Help" button a user can display a WWW-navigator window with a description of the "Users" window and possible actions (Fig. 3.10). Note that "Help" button is located in most of the windows, making it possible to invoke contextual help system at any time. To facilitate using help system, an interactive "Table of contexts" is provided. This utility can be accessed by pressing "Web Wisdom NT Help" link located always at the very beginning of the help page (Fig. 3.11).

Fig. 3.10. HELP navigator window

Fig. 3.11. HELP navigator window in another context with visible "Table of contents" link
3.3. Changing default user’s properties
After successful log-in, a user can change default values for his/her attributes. By pressing "Defaults" button in the main window, a new window enabling setting user’s attributes is invoked. A new window appears enabling to set new values of the attributes. There are three layers in the window: (1) fonts & colors, (2) images, and (3) general (Figs. 3.12a, 3.12b, and 3.12c, respectively) grouping similar properties. There are five buttons on the bottom of the window: "Get defaults", "Reload from database", "Save Presentation Attributes", "Help", and "Cancel". The first one is used to identify default values taken into consideration if nothing is defined in the window. The order of searching for a default value is the following: foil property, if not defined - presentation property, if not defined - foilworld property, if not defined - user property. The second button is used to discard any changes introduced since the last save and continue setting properties. The third button is used to store the new property values in the database. The last two buttons –can be used to display help information and to exit from the window without saving new property values in the database.
The first layer – "Fonts & colors" can be used to define font sizes and text colors for texts being parts of foils, mainly titles and bullets. In the upper-left corner of the window property names are displayed. A user can select one property at a time. The selected property is highlighted. Color names are displayed in the upper-right part of the window. The selected color is displayed in the lower-right part of the window. A name of the selected color is at the same time a value of the selected property. In the lower-right part of the window a user can fix sizes of fonts used to display the texts (i.e., titles and bullets).
a) 
b) 
c) 
Fig. 3.12. Setting defaults for user’s properties: (a) for fonts and colors, (b) for images, and (c) - general ones
The second layer "Images" is used to define images for buttons and backgrounds. In the upper-left corner of the window a user can select a property to be defined. In the right part of the window an image can be selected to be a value of the selected attribute. The following additional information is displayed about the image: size in bytes, original width and height, scaling image strategy (image scaled as defined by the parameter or displayed in its original size) for portrait and landscape direction, and scaled size.
The image is displayed in the central part of the window. A user can choose scaling for the image: tiled, centered, normal-size or scaled picture (by selecting one of the "Tiles", "Centered", "Normal" and "Scale" radio buttons). By setting strategy and size a user can set up the sizes of an image as it will be displayed (strategy: as small as possible inside a window, as big as possible inside a window, size equal to N points, N defined near-by, and original image size).
The third layer "General" is used to define general-purpose attributes:
- name of the application to play sounds,
- name of the server where the HTTP server is running,
- connection ID to the HTTP server, and
- HTML browser for displaying the "help" texts.
The values of the general properties are set as either "String" or "Numeric" value, depending on the attribute required type. It is up to a template to use either string, or numeric value of a parameter. Note that contents of the list of general properties is extensible and users may introduce new properties (used then by templates of the Exporter).
The names, meaning and values of the sample attributes are summarized in the table below.
|
Property name |
Meaning |
Domain |
Overlay |
|
Title color |
Color for displaying foil titles |
color name |
1 |
|
Background color |
Color for foil background |
color name |
1 |
|
Link color |
Color for non-visited and non-active links |
color name |
1 |
|
Visited link color |
Color for visited links |
color name |
1 |
|
Active link color |
Color for active links |
color name |
1 |
|
Text color |
Color for displaying texts (foil bullets) |
color name |
1 |
|
Font size |
Font size for displaying texts (foil bullets) |
1..7 |
1 |
|
Font size in tables |
Font size for displaying texts (foil bullets) in tables |
1..7 |
1 |
|
Title font size |
Font size for displaying titles |
1..7 |
1 |
|
Title font size in tables |
Font size for displaying titles in tables |
1..7 |
1 |
|
Audio player application |
Name of an application for playing sounds |
file name |
3 |
|
HTTP server host name |
Name of the host where used HTTP server is running |
DNS |
3 |
|
HTTP connection ID |
Connection id number of the used HTTP server |
1..9999 |
3 |
4. Foilworld Manager
The Foilworld Manager is used for:
- managing hierarchy of foilworlds,
- granting access rights to foilworlds,
- creating new foilworlds.
The Manager is equipped with full graphical user interface and interactive help system.
After successful logging, the user can manipulate his/her foilworlds by pressing "Foilworld manager" button in the main window. A new window appears (Fig. 4.1) to edit, copy, move and change properties of user’s foilworlds.

Fig. 4.1. Foilworld manager window
The hierarchy of foilworlds is displayed on the left side of the window. The foilworlds marked by green icons are fully accessible by the user (i.e., he/she has both read and write access to them). The foilworlds marked by yellow icons are accessible only in "read" mode (i.e., their contents cannot be changed by the user). The foilworlds marked by red icons are not accessible to the user (i.e., their contents cannot be neither read, nor written by the user). The contents of the foilworld or sub-foilworld can be expanded
or hidden by pressing "+" and "-"icons, respectively.
4.1. Creating foilworld
To create a new foilworld and place it in the hierarchy, first the parent foilworld must be selected. Then, after "Insert foilworld" button is pressed, a new window appears to set basic properties of the newly created foilworld: name, steward name, support name and expiration date (Fig. 4.2). The foilworld is created as a child of the previously selected parent foilworld. The "Steward" property is a name of a user who is responsible for a foilworld (default: the owner). The "User support" property is a name of a user who can give some additional information about the foilworld (default: the owner). The "Expiration date" is a date after which the foilworld should not be used anymore. The name of the foilword can be any string not exceeding 1024 characters.

Fig. 4.2. Creating a new foilworld
"Cancel" button enables to go back to the previous window without creating any new folder. After pressing "OK" button the newly defined folder is created and placed in the hierarchy (Fig. 4.3).

Fig. 4.3. Foilworld hierarchy after creating a new foilworld
4.2. Deleting foilworld
To delete an empty foilworld from the hierarchy, it must be selected and the "Delete Foilworld" button must be pressed. If the foilworld to be deleted is not empty or a user has no permissions to delete it, a message appears on the screen and the foilworld is not deleted.
4.3. Setting foilworld properties
To set properties of a foilworld, a user must select an appropriate foilworld and press the "Set attributes" button. A new window to define foilworld attributes appears on the screen. The contents of the window is similar to the one appearing while a new foilworld is created, except the owner’s name is displayed in its upper part (Fig. 4.4).

Fig. 4.4. Changing foilworld attributes
4.4. Granting privileges to foilworld
To grant foilworld access privileges to a user, the foilworld must be selected and the "User privileges" button must be pressed. A new window appears on the screen (Fig. 4.5). Read and/or write access can be granted to a particular user or all users User’s name can be fixed by the use of a pull-down menu in left-upper corner of the window, while current access rights - by the use of "Read" and "Write" check boxes in right-upper corner of the window. After setting user’s name and rights, the "Grant to User" button can be used to set the selected access rights for the foilworld and the selected user. The previously set rights are overwritten by the current values. After pressing "Exit" button the window disappears.

Fig. 4.5. Granting access to a foilworld to another user
4.5. Setting up foilworld owner
To set a new owner of a foilworld, the foilworld must be selected and the "Set Owner" button must be pressed. A new window appears on the screen. This window enables to set a new owner of the foilworld (Fig. 4.6). A new owner’s name can be chosen by the use of pull-down menu. After pressing "OK" button the ownership is granted to the selected user. Pressing "Exit" button leaves the window without ownership modification.
Ownership to a foilworld can be set only by a user who is already owner of the parent foilworld. A user can change ownership of foilworlds in his/her foilworld even if he/she is not the current owner of the children foilworlds. The "root" user is the owner of the "Root" foilworld that gathers all other foilworlds in the system. As a result the "root" user can change ownership to any foilworld.
If the new owner is different than the owner of the parent foilworld the selected foilworld belongs to, the ownership can be treated as "temporary". The owner of the parent foilworld always has permissions to set the ownership back to his name (i.e., to take back the selected foilworld).

Fig. 4.6. Setting a new owner for a foilworld
4.6. Moving foilworld to another place in the hierarchy
Foilworlds can be moved inside the hierarchy by placing a foilworld in a buffer and then sending the contents of the buffer to another foilworld. This mechanism is similar to "Cut & Paste" utility well known from any text editor. To copy a selected foilworld, "Cut" button must be pressed. Next, the destination "parent" foilworld must be selected and "Paste" button must be pressed. In effect, the previously selected foilworld is placed as a direct "child" to a selected "parent" foilworld. The movement is recursive, i.e. it is performed together with all children foilworlds. To finish the manipulation on foilworlds, "Exit" button can be pressed. Note that there is no "Cancel" button, i.e., the changes made during a session cannot be rolled-back.
5. Presentation Manager
The Presentation Manager is used for:
- managing hierarchy of presentations,
- copying and moving presentations belonging to foilworlds,
- editing meta-data for presentations and their parts (sub-presentations and individual foils),
- creating new presentations.
The Manager is equipped with full graphical user interface and interactive help system.
After successful log-in, the user can start manipulate his/her presentations by pressing "Presentation Manager" button in the main window. A new window appears (Fig. 5.1), which enable to edit, copy, move and change properties of user’s presentations. The window consists of four parts:
- upper-left corner - foilworld hierarchy,
- upper-right corner - contents of the currently selected foil of a presentation or presentation abstract,
- lower-left corner - presentations inside the selected foilworld,
- lower-right corner - editing window with buttons.

Fig. 5.1. Presentation manager window
To create or edit a presentation, first a foilworld must be selected. The foilworld hierarchy (sub-window "Foilworld") is similar to the one displayed in the window for manipulating foilworlds (cf. Section 4). The presentations belonging to the selected foilworld are displayed in sub-window "Existing Presentations". The presentations are displayed in tree-like form. On highest level of hierarchy all presentations that belong to the currently selected foilworld are displayed. Any of these presentations can be expanded by pressing the "+" icon near the presentation name. A presentation can be composed of foils or other presentations – sub-presentations in a recursive way. Presentations are marked by "book" icon while foils by "sheet" icon. Sub-presentations can be expanded the same way as other presentations. A user can select any of the foils or presentations. If a foil is selected and this foil has a graphical form (i.e., an image), it is displayed in upper-right corner of the window. If a presentation is selected the graphical form of its abstract foil is displayed. A user can scroll down and up the lists of foilworlds, presentations and foils by pressing up and down arrow keys on the keyboard or moving a scrollbar. Creating new presentation
To create a new presentation, button "New Presentation" must be pressed. As the newly created presentation has no member foils or sub-presentations, the editing window is empty. However, above this window a name of the presentation is displayed together with its foilworld to inform that a presentation is under construction (Fig.5.2).

Fig. 5.2. Presentation window - creating an empty presentation
Just after invoking "New Presentation" button, a new window appears on the screen with presentation properties to be set up (Fig. 5.3). A user must write the obligatory fields and may write the non-obligatory ones, according to the table below.
|
Field name |
Property meaning |
Obligatory |
Examples |
|
Title |
Title of the presentation |
Yes |
Java Programming Course |
|
Subject |
Knowledge domain of the presentation |
Yes |
history, chemistry, computer science |
|
Form |
A way the material is to be presented |
Yes |
course, example, tutorial |
|
Prerequisites |
What a user should know to understand the presentation |
No |
any programming language, e.g. C/C++ |
|
Source platform |
Hardware and software requirements |
No |
sound card, MPEG player |
|
Keywords |
A few words describing the presentation |
Yes |
Internet, programming |
|
Interactivity |
Level of interaction between a user and the system |
Yes |
low, middle, high |
|
Learning level |
A pair age:skill; 0:0 means that learning level is undefined; age=0..99, skill=0..5 |
Yes |
0:0, 20:1, 15:5 |
|
Expiration date |
Date the presentation should stop being used |
yes |
31-12-2005 |
|
Steward |
A user who is responsible for the presentation, default an owner |
yes |
smith, root |
|
Support |
A user who can give some additional information about the presentation, default the owner |
yes |
brown |

Fig. 5.3. New presentation - setting properties
After filling all the obligatory fields, a user can press "OK" button to store attributes in the database. If a user exits the window, a message appears "Cannot create presentation" and a new presentation is not created.
A user can also add add-ons for the presentation and change its formatting properties. To add an add-on, he must press "Add add-on" button. A new window appears to define parameters of a new add-on, and to edit parameters for the previously defined add-ons (Fig. 5.4). The window has five buttons. By the use of "Delete" button a user can delete any already defined add-on. By the use of "New" button a user can define a new add-on. A new window appears to define add-on parameters (Fig. 5.5): title, address in URL format, source platform (detailed requirements on hardware and software, e.g. version of the system or browser, type of the sound card, video stream decoder, etc.), expiration date, window attributes in which the add-on appears on the screen, and a presentation mode. The last parameter defines a way the add-on is invoked: automatic means it is started automatically when its foil or presentation is displayed (in a separate window, however), and manual - it is started by hand after clicking on its title.
Once an add-on is set up, it can be edited by the use of "Edit" button in the add-on main window (cf. Fig. 5.4). A new window – similar to the one for defining a new add-on – appears (cf. Fig. 5.5).
By the use of "Help" button a user can invoke a window with a helping description of the process of defining and editing add-ons.
By the use of "Exit" button a user can quit the window. All the defined add-ons are stored in the database.

Fig. 5.4. New presentation - setting add-ons
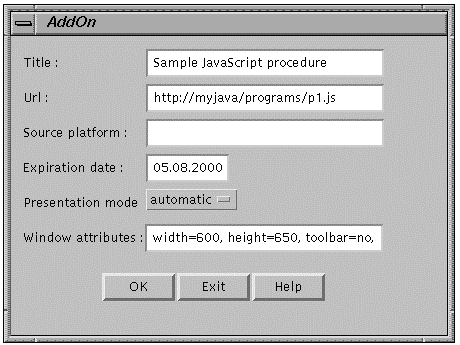
Fig. 5.5. New presentation - adding a new add-on
To change some formatting properties of a newly created presentation, a user must press "Formatting Attributes" button from the Presentation Manager window. A new window appears enabling to set new values of the attributes. There are three layers in the window: (1) fonts & colors, (2) images, and (3) general (Figs. 5.6a, 5.6b, and 5.6c, respectively) grouping similar properties. There are five buttons on the bottom of the window: "Get defaults", "Reload from database", "Save Presentation Attributes", "Help", and "Cancel". The first one is used to identify default values taken into consideration if nothing is defined in the window. The order of searching for a default value is the following: foil property, if not defined - presentation property, if not defined - foilworld property, if not defined - user property. The second button is used to discard any changes introduced since the last save and continue setting properties. The third button is used to store the new property values in the database. The last two buttons –can be used to display help information and to exit from the window without saving new property values in the database.
a) 
b) 
c) 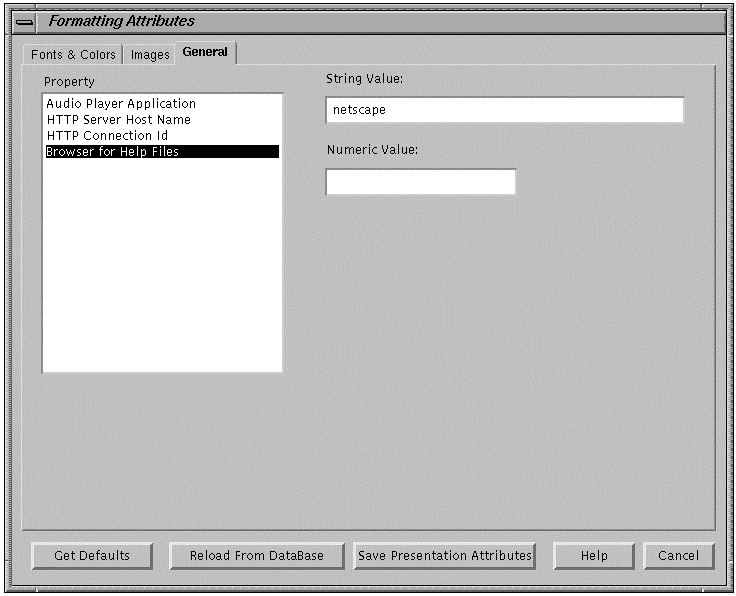
Fig. 5.6. New presentation - setting properties: (a) for fonts and colors, (b) for images, and (c) - general ones
The first layer – "Fonts & colors" can be used to define font sizes and text colors for texts being parts of foils, mainly titles and bullets. In the upper-left corner of the window property names are displayed. A user can select one property at a time. The selected property is highlighted. Color names are displayed in the upper-right part of the window. The selected color is displayed in the lower-right part of the window. A name of the selected color is at the same time a value of the selected property. In the lower-right part of the window a user can fix sizes of fonts used to display the texts (i.e., titles and bullets).
The second layer "Images" is used to define images for buttons and backgrounds. In the upper-left corner of the window a user can select a property to be defined. In the right part of the window an image can be selected to be a value of the selected attribute. The following additional information is displayed about the image: size in bytes, original width and height, scaling image strategy (image scaled as defined by the parameter or displayed in its original size) for portrait and landscape direction, and scaled size.
The image is displayed in the central part of the window. A user can choose scaling for the image: tiled, centered, normal-size or scaled picture (by selecting one of the "Tiles", "Centered", "Normal" and "Scale" radio buttons). By setting strategy and size a user can set up the sizes of an image as it will be displayed (strategy: as small as possible inside a window, as big as possible inside a window, size equal to N points, N defined near-by, and original image size).
The third layer "General" is used to define general-purpose attributes:
- name of the application to play sounds,
- name of the server where the HTTP server is running,
- connection ID to the HTTP server, and
- HTML browser for displaying the "help" texts.
The values of the general properties are set as either "String" or "Numeric" value, depending on the attribute required type. It is up to a template to use either string, or numeric value of a parameter. Note that contents of the list of general properties is extensible and users may introduce new properties (used then by templates of the Exporter).
The names, meaning and values of the sample attributes are summarized in the table below.
|
Property name |
Meaning |
Domain |
Overlay |
|
Title color |
Color for displaying foil titles |
color name |
1 |
|
Background color |
Color for foil background |
color name |
1 |
|
Link color |
Color for non-visited and non-active links |
color name |
1 |
|
Visited link color |
Color for visited links |
color name |
1 |
|
Active link color |
Color for active links |
color name |
1 |
|
Text color |
Color for displaying texts (foil bullets) |
color name |
1 |
|
Font size |
Font size for displaying texts (foil bullets) |
1..7 |
1 |
|
Font size in tables |
Font size for displaying texts (foil bullets) in tables |
1..7 |
1 |
|
Title font size |
Font size for displaying titles |
1..7 |
1 |
|
Title font size in tables |
Font size for displaying titles in tables |
1..7 |
1 |
|
Audio player application |
Name of an application for playing sounds |
file name |
3 |
|
HTTP server host name |
Name of the host where used HTTP server is running |
DNS |
3 |
|
HTTP connection ID |
Connection id number of the used HTTP server |
1..9999 |
3 |
After setting library and formatting properties for the presentation, a user may copy to this presentation some foils and sub-presentations from any existing presentation, providing that he has read access to the source presentations. The foils and/or sub-presentations may be copied by setting up source foilworld and source presentation in upper-left and lower-left corners, respectively, and copying marked foils/sub-presentations by pressing "Copy" button. The foils/sub-presentations can be also moved from a given presentation to a new one by pressing "Move" button (Fig. 5.7). In such a case, however, a user must have write access rights granted to the source foilworld.
Note that presentations are copied only logically, i.e. by manipulating data from the database. Physical educational objects related with presentations (foils, applets, sounds, etc.) always exist in one copy only and are shared by many presentations. This approach limits, however, introducing changes to shared presentations.
There are some conditions under which a user can modify a presentation: 1) he must have write access to a foilworld the presentation is located in, and 2) this presentation must not be shared by other presentations or foilworlds. The second requirement is imposed to avoid side-effects (unwanted modification of other presentations when editing a presentation).

Fig. 5.7. Copying foils and sub-presentations to a new presentation
The buttons located in lower-right part of the window are used to edit the list of foils of the presentation (Fig. 5.8). By the use of "Remove" button a user can remove the currently selected foil or sub-presentation from the current presentation. By the use of "Up" and "Down" buttons a user can change the order of foils in the presentation.
By the use of "Set as Abstract" button a user can set a selected foil as an abstract for the presentation. The abstract is automatically displayed on the screen when the presentation is selected in the presentation window. The abstract may be also used by the exporter. There is only one abstract for the presentation. If no abstract is selected by default the first foil becomes the abstract. A foil being an abstract of a presentation is marked by "A" icon.
By the use of "Set Hidden" and "Unset Hidden" a user can mark a given foil to be invisible by the exporter. For example the abstract foil can be hidden. Hidden foils are marked by red icons, while hidden sub-presentations - by gray "book" icons.
If a foil has a sound associated with it, it is marked by a "Note" icon.
Once the editing of the new presentation is completed, a user can press "Finish" button to place the presentation in the hierarchy of foilworlds. The newly created presentation disappears from the edit sub-window and appears in the presentation sub-window. Note that there is no "Undo" button. Every copying and movement of any foil and/or sub-presentation cannot be rolled-back.
Pressing "Exit" button has similar effects to pressing "Finish" button, but the presentation window is removed from the screen. All the changes, however, are incorporated into the database.
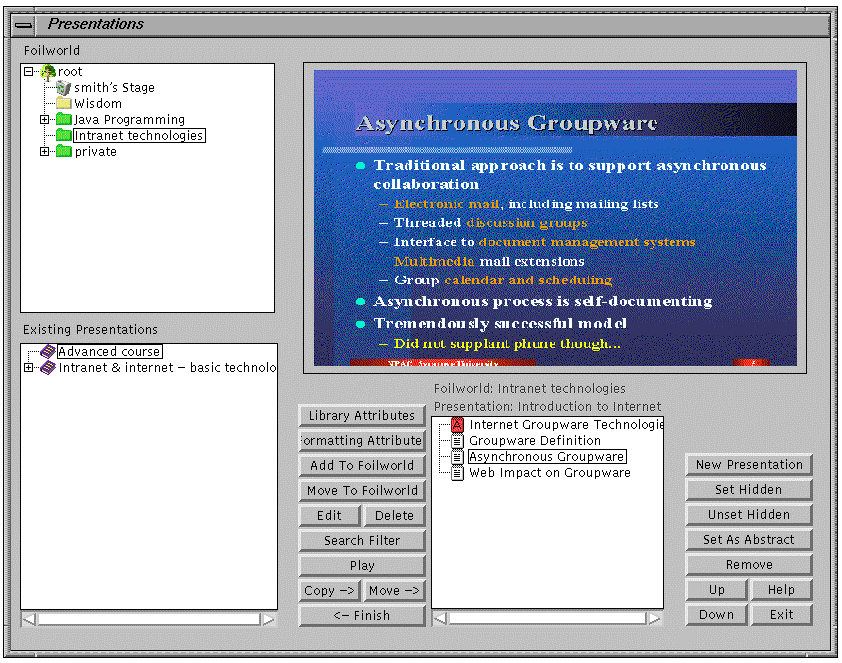
Fig. 5.8. Editing foils and sub-presentations in the presentation
5.1. Editing existing presentation
The editing of any existing presentation is similar to creation a new one, except a user presses "Edit" button after setting up the presentation in the presentation sub-window. The presentation to be changed disappears from the presentation sub-window and it is copied to the edit sub-window. After completing the editing process, a new improved version of the presentation is stored back in the foilworld hierarchy by pressing either "Finish" or "Exit" button.
5.2. Copying presentation to another foilworld
A selected presentation can be copied to another foilworld by pressing "Add to Foilworld" button. A new window appears on the screen to choose the destination foilworld (Fig. 5.9). Once the destination foilworld is chosen, a selected presentation is copied to it by pressing "OK" button. Pressing "Cancel" button inhibits copying.
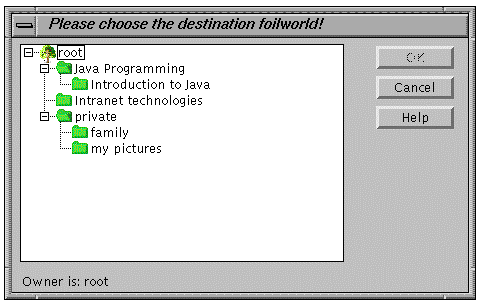
Fig. 5.9. Copying a presentation to another foilworld
5.3. Moving presentation to another foilworld
A selected presentation can be moved to another foilworld by pressing "Move to Foilworld" button. A new window appears on the screen enabling to choose the destination foilworld. The process of choosing the destination foilworld and copying the presentation is similar to the "Copying to Foilworld" process described above, except the source presentation is erased after copying is successfully done. To perform this action a user must have write access to the foilword, the presentation was originally located.
5.4. Deleting presentation
To delete the selected presentation, a user must press "Delete" button. The presentation is deleted providing that it is not used as a sub-presentation in other presentation(s) and it has no copy in another foilworld. If the presentation cannot be deleted, a message appears on the screen and the presentation remains unchanged. To perform this action a user must have write access to the foilword, the presentation is located.
5.5. Filtering presentations and their foils
A user can use "search filter" tool to display all presentations or foils satisfying certain condition – possibly a complex one. To activate this function, a user must press "Search Filter" button. A new window appears on the screen (Fig. 5.10). Using this window, the user may define the filtering criterion. Meaning of all the fields in the search window is presented in the table below.
|
Button |
Meaning |
Possible values |
|
AND/OR |
the attribute is AND-ed or OR-ed with the rest attributes |
if the attribute field is not filled with a value, the attribute is not taken to the filtering criterion, and it is nether AND-ed, nor OR-ed |
|
Title |
title of the presentation/foil |
Java Programming Language |
|
Subject |
Knowledge domain of the presentation/foil |
physics, chemistry |
|
Keywords |
Keywords of the presentation/foil |
Java, programming languages, fluids |
|
Prerequisites |
Hardware/software necessary to access the presentation/foil |
sound card, MPEG player |
|
Form |
a way the material is presented to users |
course, tutorial |
|
Author |
author’s name |
Smith, John Brown |
|
Steward |
steward’s name |
Joe |
|
Support |
user’s name to give support for the presentation/foil |
Anna |
|
Creation date |
date of the first creation of the presentation, DD-MM-YY |
31-12-1997 |
|
Expiration date |
date the presentation should not be used anymore |
31-12-2005 |
|
Version date |
date of the last modification of the presentation |
31-04-1998 |
|
Containing |
number of foils and/or sub-presentations |
at least 5, at most 35 |
|
Interactivity |
level of interaction between a user and the system |
low, medium, high |
|
Learning level |
pair age:skill |
0.99:0.5 |
|
Add-on |
title and/or URL address of an add-on |
with or without an add-on |
|
Find |
either presentations, or foils are filtered |
presentation, foil |

Fig. 5.10. Fixing searching criterion
After the filtering criterion is fixed, a user may switch on "Enable filtering" check-box to activate filtering or un-check it to suspend filtering. In any case the "OK" button accepts changes in filtering criterion, "Cancel" button discards all changes. If filtering is on, every presentation (or foil) to appear in the presentation window is checked if it fulfills the criterion. If it does, this presentation (foil) is included in the displayed list. If it do not, however, this presentation (foil) is excluded from the list and currently inaccessible for a user. If filtering is on, presentation hierarchy is flatten and all presentations or foils that meet the defined criterion are displayed on the main level. This simplifies the process of finding a presentation or foil fulfilling a given criterion.
If filtering is on, a message "Filtering on" appears in the presentation window.
Note that filtering mechanism permits also to display unique list of foils without presentation structure. To this goal, filtering for foils must be enabled, but filtering parameters should be left empty. The resulting list of foils is unique, it means that if the same foil is shared by multiple presentations, it is displayed only once.
6. Importer
The importer is responsible for storing in the database presentations either prepared by Microsoft PowerPoint or previously prepared for previous version of WebWisdom – WebWisdom 1.0. There are three possible ways to import a presentation into the database:
- importing PowerPoint presentations converted to HTML format,
- importing PowerPoint presentations converted both to HTML and RTF formats,
- importing WebWisdom 1.0 presentations regardless the way these presentations were originally prepared (i.e., by the use of PowerPoint, Persuasion, LaTeX, etc.).
The importing process is divided into several phases. During the first – obligatory – phase, a temporary directory with all the files necessary to represent a presentation is prepared (including HTML text files, images, add-ons, sounds, PowerPoint sources, etc.). During the second – optional – phase, some files from the temporary directory might be automatically edited to incorporate some additional information (about formatting, sounds, add-ons, etc.). During the third – obligatory – phase, the contents of the temporary directory is read into the database into a special foilword called "stage". Presentations from this foilword are not accessible for the templates and for other users as long as they are not copied to another foilworld by the Presentation Manager (cf. Sections 4 and 5).
In this section importing process is described for the following data formats: original PowerPoint presentations, improved PowerPoint presentations, and a WebWisdom 1.0 presentations.
6.1. Importing original PowerPoint presentations
An importing filter is provided to read into the database PowerPoint 95/97 presentation converted to HTML format and stored in a temporary directory. After reading, the newly created presentation may be edited, copied, renamed, etc. by the use of the Presentation Manager presented in the previous chapter.
Below the two obligatory phases of the importing process are presented: (1) creating a temporary directory and HTML files to be imported, and (2) reading HTML files to the database.
6.1.1. Phase 1 - copying PowerPoint presentation in HTML format to temporary directory
First phase of the importing process consists in invoking either Internet Assistant for PowerPoint 95 or "Save as HTML" command of PowerPoint 97. As a result, the following files are created in the temporary directory:
- files tlsdNNN.htm with text format of foils,
- files sldNNN.htm with graphical format of foils,
- files sldNNN.gif or imgNNN,jpg with images for the presentation foils;
- file index.htm with global index of the foils.
The files mentioned above, except the file index.htm, are used directly by the second phase of the importing process.
Please note that there are some rules that must be fulfilled while generating HTML files by the use of PowerPoint 97. These rules are the following:
- no frames should be generated (i.e., "no frame" output style),
- the buttons "Previous", "Next", "Text form", "Graphical form", and "Index" must be located on the bottom of the page – below an image,
- images must be generated either in GIF or JPEG format in any size (preferably 800x600 pixels or more),
- no animation is permitted.
6.1.2. Phase 2 - incorporating contents of the temporary directory to the database
The temporary directory prepared in the first phase in scanned during the second phase and its content is read into the database. To perform this task, a user must press "Load Presentation" button in the main window. As a result, a new window appears to determine the temporary directory in which the prepared presentation is stored (Fig. 6.1).

Fig. 6.1. Setting the temporary directory as an input for the second phase of importing process
In this window, a user must set up the directory by the use of either the dialog window and "Explore" button, or write a directory name manually and press the "Open" button. Once the directory is chosen, a user should press "Check" button to determine the contents of this directory. If the directory contains HTML files being a processed PowerPoint presentation, a radio button "HTML generated by PowerPoint" is set to "on" and a new button "Store" appears in the bottom part of the window (Fig. 6.2). A message appears near-by telling how many slides is included in the directory and whether the source PowerPoint (*.ppt) file is included. If the selected directory does not contain any HTML files being a presentation or the presentation is not complete, a message appears "This directory does not contain coherent data". In such case, a user should chose another directory. Note that if the temporary directory does not contain any HTML file being a foil of a presentation, button "Store" disappears thus the data cannot be stored.
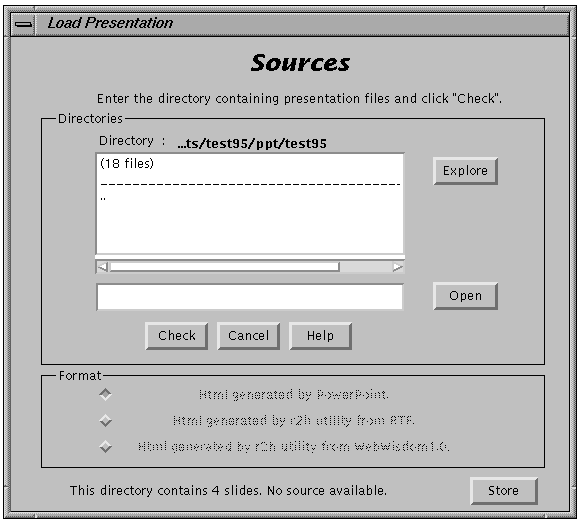
Fig. 6.2. Checking the contents of the temporary directory
If the directory contents is correct, a user may press "Store" button and incorporate the presentation into the database. A new window appears on the screen to set up the presentation attributes (Fig. 6.3). This window is similar to the window for setting up the attributes for newly created presentation (cf. Section 4). The obligatory parameters are: title of the presentation, keywords, and subject. Some parameters are generated automatically, although they may be still changed by a user (form, expiration date, learning level, interactivity, steward and support names. An information is also provided whether the presentation contains only texts and images, or it is extended by sounds, apples, or other elements. A user can also add an add-on for a presentation, as well as change its formatting attributes (cf. Section 4.1).
After filling all the obligatory fields and pressing "OK" button, this window disappears and a new window appears instead to define attributes for the foils of the presentation (Fig. 6.4). The foil attributes may be either filled manually, i.e. by filling the fields of the window, or automatically, by copying attribute values from the presentation attributes (pressing "×
×
" icon in lower-left part of the window) or from the previous foil (pressing "×
" icon). The graphical form of a foil, i.e., an image generated by PowerPoint, is displayed in right part of the window. A user is requested to fill the fields: title (mandatory), subject (mandatory), keywords (mandatory), form (mandatory, pull-down list), interactivity (mandatory, pull-down list), expiration date (mandatory), blob style (mandatory, pull-down list: image essential - HTML form does not contain all the information necessary to display a foil, image useful - HTML form may be used, but some information is missing, image as HTML form - no information is missing while using HTML form instead an image, and no image), hardware and software platform (optional), signature (optional), sound related to a foil (optional, pull-down list of detected sound files; default a sound file with the same number as the current foil is displayed, if it exists), and time which should be reserved to present a foil (optional, in seconds, usually related to a playing time of a sound file for a foil).
In the upper-right corner of the window a check-box is located labeled „Abstract". If this check-box is set to on, the current foil becomes an abstract of the presentation. If an abstract has been already selected as one of the previously defined foils, this selection is forgotten and only the newly selected foil is taken into consideration as the abstract for the presentation. If no foil is selected as an abstract, automatically the first foil of the presentation becomes an abstract.
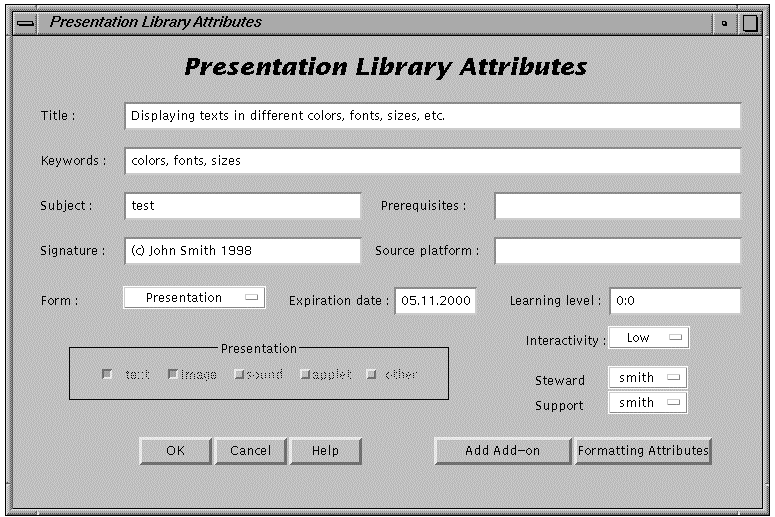
Fig. 6.3. Setting up presentation attributes
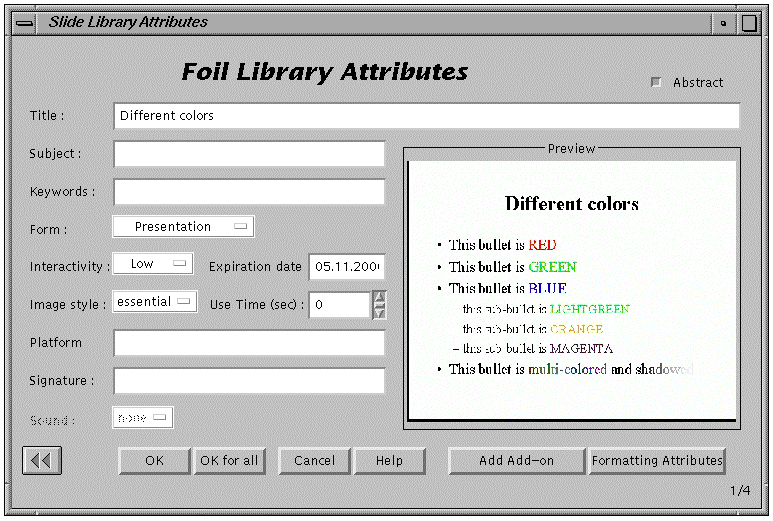
Fig. 6.4. Setting the attributes for a foil of a presentation being imported
In the bottom part of the window a few buttons are located. Their meaning is described below:
- "OK" button - putting the current foil to the database,
- "OK for all" button - putting the current foil and the remaining foils to the database, automatically setting the attribute values for each foil as equal to the values which are set for the current foil or automatically generated values – where possible,
- "Exit" button - exiting the importer; no presentation is put to the database,
- "Add add-on" button - defining/editing an add-on for the current foil (cf. Section 4.1),
- "Formatting attributes" button - defining fonts and background images (cf. Section 4.1).
After setting the attributes for all foils of the presentation, the newly imported presentation is stored in a foilworld named "user stage", where "user" is a name of a user who is importing the presentation. After successful reading, the presentation may be edited by the Presentation Manager, copied to another place in the foilworld hierarchy, used as a part of another presentation, etc. (cf. description of the Presentation Manager in Section 4).
6.2. Importing RTF-based PowerPoint presentations
An importing filter is provided to read into the database PowerPoint 95/97 presentation converted to both RTF and HTML formats and stored in temporary directory. RTF outline of the presentation is used to enrich HTML files with some information about text formatting, in general these are colors, font sizes and font types (families). Moreover, some user-defined attributes may be added to the HTML files by the use of the configuration utility. After reading, the newly created presentation may be edited, copied, renamed, etc. by the use of the Presentation Manager presented in the previous chapter.
Below, the configuration utility and the four phases of the importing process are presented: (1) creating a temporary directory and HTML files to be imported, (2) creating an outline of the presentation in RTF format, (3) compiling RTF outline and generating new improved HTML files, and (3) reading HTML files to the database.
6.2.1. Configuration utility
The compiler from RTF outline to the database internal format uses some user-defined parameters. These parameters are stored in a configuration file named "r2h.ini" located always in the temporary directory. This file has a format similar to RTF. Each command must begin with slash character ‘\’ and can be followed by any number of white spaces. If a command is followed by a parameter, this parameter must be included in ‘"’ characters and must not exceed one line. The text, which is not a command or a parameter is ignored, as well as all white spaces, newlines, tabs, etc. The meaning of all the configuration parameters is explained in the table below. Note that some of the commands are similar to WebWisdom 1.0 commands for formatting a foilset (for details see next section about importing WebWisdom 1.0 presentation). Some of the commands are not used while converting from RTF to HTML. These commands are printed in italics.
|
Configuration parameter |
Meaning |
Possible values |
Defaults |
|
\inputfile |
name of the main translation file |
file name |
"course.gcf" |
|
\scriptfile |
name of the script for copying image files |
file name |
"cp_imgs" |
|
\scripttype |
type of the script for copying image files |
"u*", "d*" |
"unix" |
|
\scriptcopycommand |
name of the command to copy image files |
"cp", "copy" |
"copy" |
|
\outputdirectory |
name of the directory with files being result of the compilation; this name must be either ended by (back)slash or null |
directory name |
"" |
|
\outputstyle |
style of the generated HTML foil |
"paragraphs", "bullets", "tables" |
"paragraphs" |
|
\tableattributes |
HTML attributes of <TABLE> element "border=N cellspacing=N cellpadding=N width=NN%" |
"*" |
"" |
|
\scale |
font scaling for RTF (PowerPoint) translator, must be a number 0..1000, always taken as a percentage (100% - no scaling, 50% - divide font sizes by two, etc.) |
"NNN%" |
"100%" |
|
\fonts |
font family, three first characters are meaningful, possible values are: "windows" and "iso"; currently used only for Polish language and families "windows-1250" and "iso-8859-2" which differ by three national character codes |
"win*", "iso" |
"iso" |
|
\links |
adding PowerPoint-like table with links to previous and next foil at the end of the current foil; if this command is omitted, there is no table with links |
|
|
|
\previous |
text displayed as link to previous foil |
"*" |
"Previous" |
|
\next |
text displayed as link to next foil |
"*" |
"Next" |
|
\graphics |
text displayed as link to graphical version of a foil |
"*" |
"Graphics" |
|
\contents |
text displayed as link to table of contents |
"*" |
"Table of Contents" |
|
\text |
text displayed as link to text version of a foil |
"*" |
"Text" |
|
\iconwidth |
horizontal size in pixels of an icon with foil image in table of contents |
"NNN" |
"200" |
|
\iconheight |
vertical size in pixels of an icon with foil image in table of contents |
"NNN" |
"150" |
|
\sethtmlbgfile |
name of the file set as background for the text form of the foil |
"*" |
"" |
|
\setimagebgfile |
name of the file set as background for the graphical form of the foil |
"*" |
"" |
|
\titlefontsize |
font size for the title of a foil |
"1..7" |
"" |
|
\intablefontsize |
font size for the table inside a foil |
"1..7" |
"" |
|
\bgcolor |
background color for the foil |
"*" |
"" |
|
\intablebgcolor |
background color for the tables inside a foil |
"*" |
"" |
|
\fgcolor |
text color for the foil |
"*" |
"" |
|
\linkcolor |
link color for the foil |
"*" |
"" |
|
\alinkcolor |
active link color for the foil |
"*" |
"" |
|
\vlinkcolor |
visited link color for the foil |
"*" |
"" |
|
\imagelinkcolor |
link color for the foil |
"*" |
"" |
|
\imagealinkcolor |
active link color for the foil |
"*" |
"" |
|
\imagevlinkcolor |
visited link color for the foil |
"*" |
"" |
|
\tablelinkcolor |
link color for the foil |
"*" |
"" |
|
\tablealinkcolor |
active link color for the foil |
"*" |
"" |
|
\tablevlinkcolor |
visited link color for the foil |
"*" |
"" |
|
\htmltitlecolor |
title color for the text form of a foil |
"*" |
"" |
|
\imagetitlecolor |
title color for the graphics form of a foil |
"*" |
"" |
|
\horizimagewidth |
horizontal size of the foil image |
"NNNN" |
"" |
|
\horizimagestyle |
type of setting size of foil image; if does not set to "native", the "horizimagewidth" command parameter is taken into consideration |
"maximum", "minimum", "native", "parmvalue", |
"native" |
|
\vertimagewidth |
vertical size of the foil image |
"NNNN" |
"" |
|
\vertimagestyle |
type of setting size of foil image; if does not set to "native", the "vertimagewidth" command parameter is taken into consideration |
"maximum", "minimum", "native", "parmvalue", |
"native" |
To deal with configuration files in the temporary directories, the configuration utility is provided which is equipped with full graphical user interface. Unlike other
WebWisdom NT tools, this tool can be invoked as a separate applet, but usually it is invoked as a part of RTF-to-database compilation process (cf. next section). The applet used separately does not communicate with the database, and it is used only to determine the contents of a configuration file from the temporary directory. Sample invocation scripts for this applet and for UNIX- and DOS-based systems are presented in Fig. 6.5 and 6.6, respectively.
|
SET ENV=2000
SET CLASSPATH=.;..\classes111.zip;..\symbeans.jar;util;..\sym\classes.zip;..\sym\symclass.zip
cd \wisdom\pm\r2h
appletviewer run.html |
Fig. 6.6. Invocation script for the configuration utility, DOS version
|
CLASSPATH=$CLASSPATH:.:/u/java/oracle/jdbc/lib/classes111.zip:/u/public/Symantec/symbeans.jar
export CLASSPATH
cd /u/public/programs/wisdom/pm/r2h
/usr/java/bin/appletviewer run.html |
Fig. 6.6. Invocation script for the configuration utility, UNIX ksh-version
The detailed description of this applet usage is presented in Section 6.2.4, together with method of importing RTF-based presentations to the database. Using applet in a separate way will be rather seldom and it is out of the scope of this document, thus setting configuration is described only as an integral part of RTF-to-HTML compiling process rather than a standalone process.
6.2.2. Phase 1 - copying PowerPoint presentation in HTML format to temporary directory
This phase is similar to the first phase of reading PowerPoint presentation (cf. Point 6.1.1).
6.2.3. Phase 2 - generating RTF outline of the presentation
Outline of the presentation in RTF (Reach Text Format) can be generated by "Save As Outline (RTF)" command from "File" menu of PowerPoint95/97.
6.2.4. Phase 3 - compiling RTF outline and enriching HTML files
The beginning of this phase is similar to the phase 2 of reading a standard PowerPoint presentation (cf. Section 6.1). A window appears to determine the working directory with RTF-based presentation to be loaded. After pressing "Check" button the "HTML generated by r2h utility from RTF" is chosen in the field below (Fig. 6.7).
After detecting a directory with a ready-to-load RTF-based presentation, a new button appears in the bottom part of the window labeled "Convert". By pressing this button a user can invoke RTF/HTML compiler to enrich the HTML files located in the directory (originally generated by PowerPoint) by some formatting information (colors, fonts, sizes, etc.) extracted from RTF file. After pressing "Convert" button, a new window appears to determine the configuration parameters (Fig. 6.8). If a user presses "No" button, he/she decides to proceed with standard compiler parameters. If, however, he/she wants to change some parameters and thus have an influence on the compiling process, "Yes" button must be pressed. In such case a new window appears (Fig. 6.9) to deal with configuration parameters stored in r2h.ini configuration file (cf. Section 6.2.1). As the same tool is used to define parameters for importing WebWisdom 1.0 presentation (cf. next section), some fields (used only for preparing standalone presentations or importing WebWisdom 1.0 presentations) are set as inactive. An inactive field cannot be changed, which is marked by displaying both label and contents of such field in gray. The contents of an inactive field may be, however, set automatically to a system-defined value and then used by the compiler.
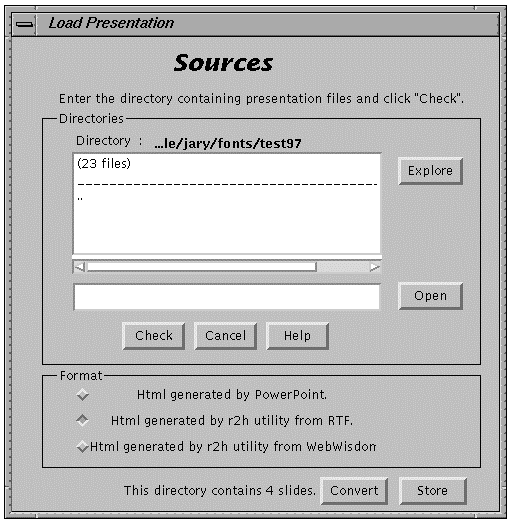
Fig. 6.7. Detecting RTF-based presentation
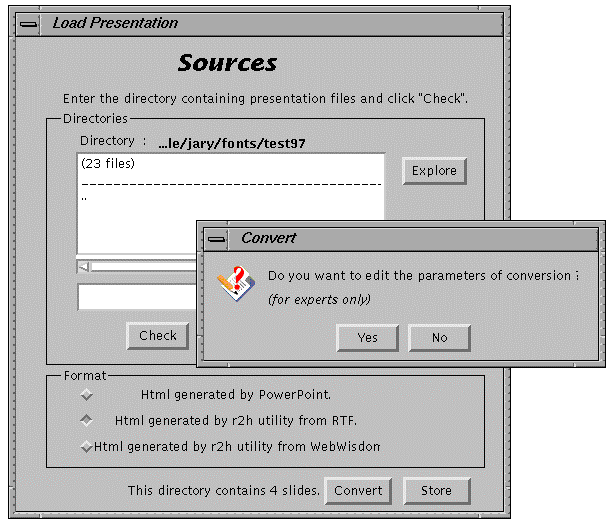
Fig. 6.8. Determining standard/user-defined parameters for compiling RTF-based presentation
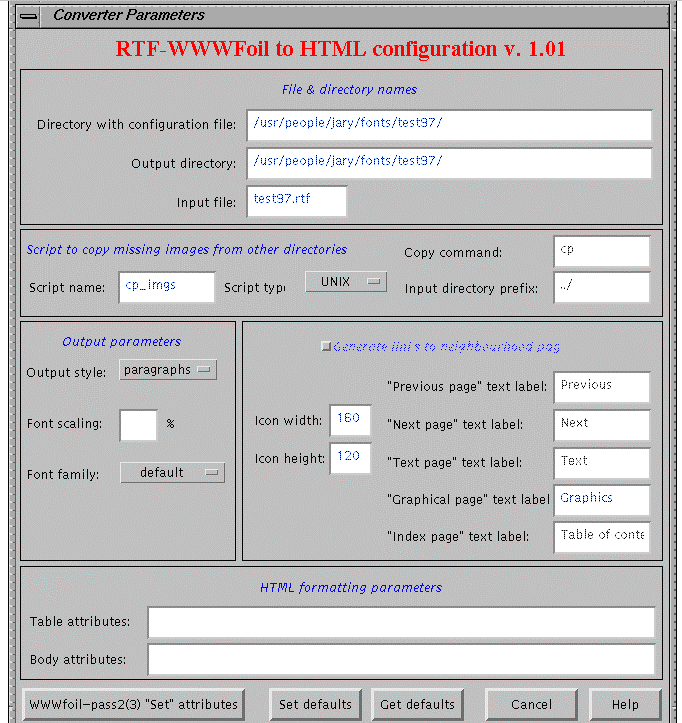
Fig. 6.9. Defining basic parameters for compiling RTF-based presentation
There are five buttons located in the bottom part of the window:
- "WWWfoil-pass2(3) "Set" attributes" button is used to define some formatting and library parameters, mainly used by the importer from WebWisdom 1.0 format (see the table with configuration parameters in Section 6.2.1),
- "Set defaults" button is used to create a new configuration file; previous version of this file – if exists – is erased; if a user has no rights to write to the selected directory, or the directory does not exists, a message is displayed on the screen and nothing is written,
- "Get defaults" button is used to read a configuration file r2h.ini from a directory pointed by "Directory with configuration file" field; if a user has no rights to read the contents of the selected directory, or the file does not exists, a message is displayed on the screen and nothing is read (i.e., all parameters remain unchanged),
- "Cancel" button is used to exit the window and continue the compilation process with no modification of configuration parameters,
- "Help" button is used to display a "help" text about the configuration utility.
As it was previously mentioned, the configuration utility may be used also in a standalone way (i.e., outside the Presentation Loader) to determine the contents of a configuration file r2h.ini in a given directory. Thus, while invoking this utility from the Presentation Loader, some fields are set as inactive – they cannot be changed by the user, but they may be used by the compiler. The inactive fields are displayed in gray.
Setting all the parameters is not necessary. The undefined values will be automatically set during compilation to compiler defaults. A given parameter is undefined if either its value is empty, or (if a parameter has a list of possible values) its value is defined as "default".
The window is composed of six parts. In the first part labeled "File & Directory Names", a user may set:
- a name of the temporary directory, i.e., a name of the directory to which the configuration file will be copied after pressing "Set defaults" button (or read by pressing "Get defaults" button);
- a name of an output directory, i.e., a name of a directory which will serve as a temporary directory for the r2h compiler described in the next section; files being inputs and results of the compilation are read/written to this directory; empty field means that the current directory is the temporary one;
- a name of a file being main input for r2h compiler (see next section for details).
In the second part of the window labeled "Script to copy missing images from other directories" some parameters are defined for copying by hand missing images while importing WebWisdom 1.0 presentation (for details see next section about importing from WebWisdom 1.0 system). These parameters are the following:
- script name, i.e., a name of a file which will be generated as a script to copy missing images,
- a name of a command to copy files (mainly "cp" command for UNIX and "copy" command for DOS-based systems),
- type of the script (UNIX shell script or DOS/WINDOWS "*.bat" file),
- a prefix for input file names (usually, one level down in the directory structure).
In the third part of the window labeled "Output parameters" a user may chose:
- style of the generated output (i.e., style of HTML files being results of the compilation); the possible choices are: paragraphs (lists of HTML paragraphs), bullets (HTML bulleted lists), and tables (HTML tables); note that only the first value is accepted by the database (see next section for details);
- font scaling factor, as a percentage (e.g., 100% means a font sizes are unchanged, 50% - they will be two times smaller, etc.),
- font family, used to define national font families (see the table above for details).
In the fourth part of the window labeled "Generate links to neighborhood pages" a user may:
- generate "Next", "Previous", "Graphical version", "Text version", and "Index" buttons in every HTML file being a foil; in such a case, output generated by the compiler is treated as a stand-alone, PowerPoint-like presentation, not to be imported to the database,
- set texts which are displayed on the screen over buttons while a user select a button by mouse pointer (only while displaying stand-alone presentation using standard HTML browser),
- set sizes of icons displayed in the index file (i.e., a file called "index.htm" containing a table with links to all the foils of the stand-alone presentation).
Note that these parameters are not used by the database, thus "Generate links to neighborhood pages" check-box must be off while importing a presentation to the database.
In the fifth part of the window a user may set attributes used for <TABLE> and <BODY> HTML tags while generating a stand-alone presentation. These values are not used while importing a presentation to the database.
While invoking the configuration utility from the Presentation Loader, the only active fields are: "Font scaling" and "Font family".
By pressing "WWWfoil-pass2(3) "Set" parameters" button a user may set some additional parameters used to pre-format a presentation and/or its foils. A new window appears on the screen with six frames: "Library attributes", "Colors", "Images", "Fonts", "Links", and "Sizes". There are five buttons located in the bottom part of the window. By the use of "Exit&Done" button a user may store the newly defined values of the parameters in the configuration file. By pressing "Cancel" button it is possible to discard all the changes made in the window and go back to the main window of the configuration utility. Buttons "Get defaults", "Set defaults", and "Help" have the same meaning as for the main window.
The "Library attributes" frame (Fig. 6.10) is used to set some attributes specific for library use, e.g., a name of the presentation, author name, date of the modification, etc. These parameters are not used by the database directly (except "Title" and "Signature" parameters), although they may be used by the exporter and user-defined templates. The unused parameters are displayed in gray, while the used ones - in black. For details see a description of WebWisdom 1.0 "Set" parameters in the next section.
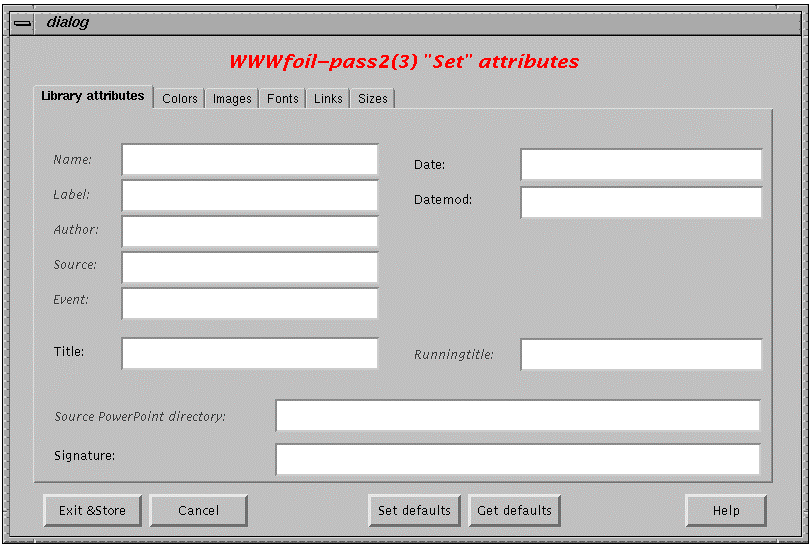
Fig. 6.10. Defining "Library" properties
The "Colors" frame (Fig. 6.11) is used to define names of colors for backgrounds and fonts (for texts inside a foil and titles). The colors are defined for text versions of foils (i.e., while displaying a text HTML version of a foil), for graphical versions (i.e., while displaying an image form of a foil), and for foils being or containing HTML tables. The color names should be defined in the database (cf. setting "Defaults" in the previous section). During compilation, these names are verified and the undefined colors are not taken into consideration.
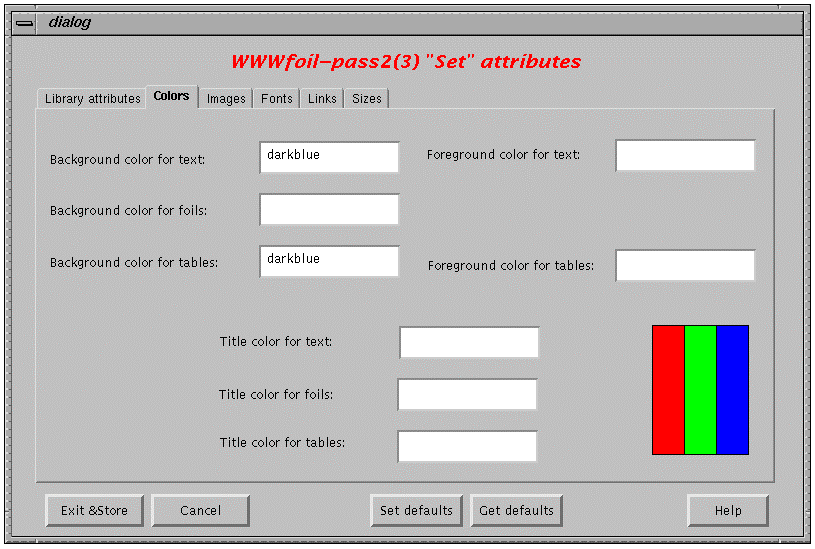
Fig. 6.11. Defining "Color" properties
The "Images" frame (Fig. 6.12) is used to define images used as backgrounds for foils. The images are defined for text versions of foils, for graphical versions, and for foils being or containing HTML tables. The image names should be defined in the database (cf. setting "Defaults" in the previous section). During compilation, these names are verified and the undefined images are not taken into consideration.
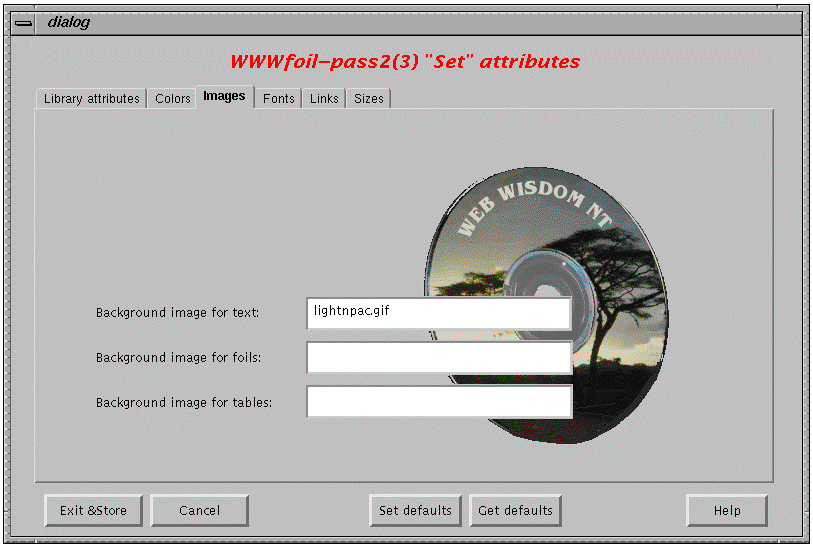
Fig. 6.12. Defining "Images" properties
The "Fonts" frame (Fig. 6.13) is used to define font sizes used to display a text inside a foil, a text inside a table, and a foil title. Font sizes are defined in HTML style as values from 1 (the smallest font) to 7 (the biggest one).
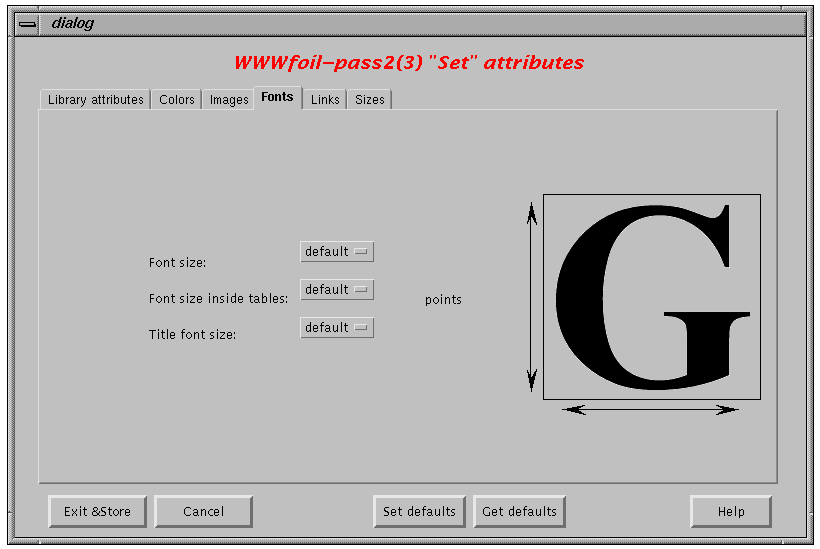
Fig. 6.13. Defining "Fonts" properties
The "Links" frame (Fig. 6.14) is used to define colors of links: un-visited, visited and active, for text, graphical, and table forms of foils. The color names should be defined in the database (cf. setting "Defaults" in the Section 2). During compilation, these names are verified and the undefined colors are not taken into consideration.
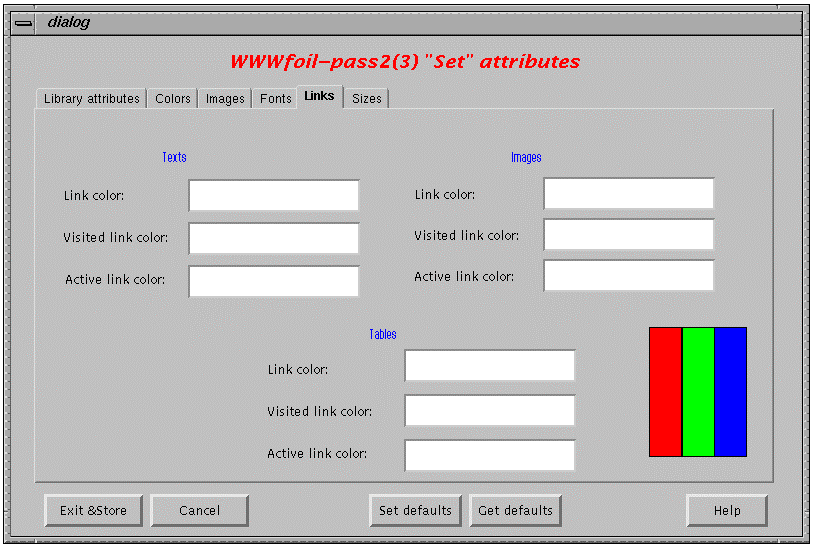
Fig. 6.14. Defining "Links" properties
The "Sizes" frame (Fig. 6.15) is used to define style of displaying images. The defined style, both for horizontal and vertical directions, should be defined as: native (i.e., an image is displayed in its original size), minimum (i.e., an image is displayed not smaller than a given size), maximum (i.e., an image is displayed not bigger than a given size), parmvalue (i.e., an image is displayed in an exact size defined near-by). The latter three choices should be accompanied by setting a value in the appropriate "Size" field.
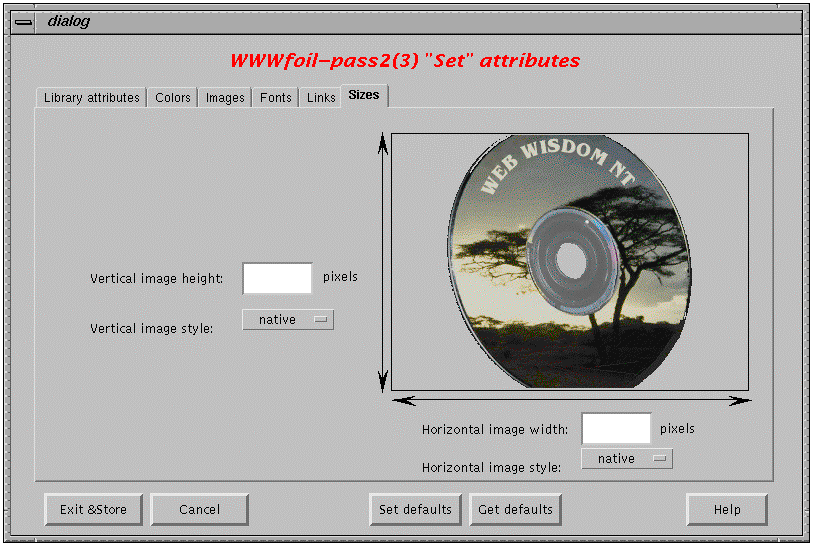
Fig. 6.15. Defining "Sizes" properties
After setting the configuration parameters, outline of the presentation in RTF format is compiled (Fig. 6.16).
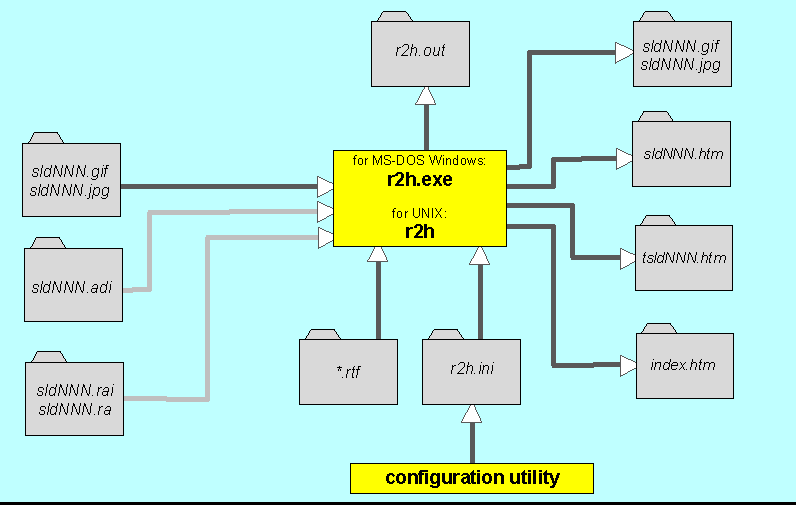
Fig. 6.16. Files read and written during third phase of the importing process
The main input for the compilation is an RTF file generated in the second phase. Basing on this file a set of HTML files is generated: files index.htm (text and graphical index of foils), sldNNN.htm (graphical forms of foils), and tsldNNN.htm (text forms of foils). The files mentioned above overwrite the respective HTML files originally generated in the first phase. Files with images generated in the first phase - slsNNN.gif and/or sldNNN.jpg and/or imgNNN.jpg - remain unchanged. Detailed description of the performed compilation process is generated to the file named "r2h.out" in the current directory. After compilation, the contents of this file may be automatically displayed in a window with compilation history.
Note that attributes from r2h.ini configuration file (cf. Point 6.2.1) are automatically incorporated to the database, as well as add-on definitions (files sldNNN.adi) and sounds (files sldNNN.rai and sldNNN.ra). The two latter, however, must be in the format of WebWisdom 1.0 system (for details see next section about compiling WebWisdom 1.0 presentations).
The output generated by the compiler is the following.
An HTML file with index to both text and graphics forms of foils. Sample file is presented in Fig. 6.17.
It is a set of HTML files being text forms of foils. Each file exists in one of the following styles:
- "paragraphs" - an output is a set of HTML paragraphs marked by <P> tags with two attributes: bulleting level and a transition factor from previous bulleting level. Tag <P LEVEL=0, TRANSITION=+0> means a paragraph is a foil title. Tag <P LEVEL=N, TRANSITION=+M> means a paragraph is a bullet of level N, and the level of the previous bullet was M-N. Tag <P LEVEL=N, TRANSITION=-M> means a paragraph is a bullet of level N, and the level of the previous bullet was N+M. There are nine bulleting levels, numbered from 1 to 9, respectively. The greater the bulleting level is, the more the bullet should be right-intended and its text should be smaller. A sample HTML file in the style "paragraphs" is presented in Fig. 6.18;
- "bullets" - an output is an HTML unnumbered list generated by the use of <UL>, <LI>, </LI>, and </UL> tags. A sample HTML file in the style "bullets" is presented in Fig. 6.19. This style is not intended to be used by the database. It is provided only for compatibility with standard PowerPoint presentations converted to HTML and can be used to generate a standalone presentation;
- "tables" - an output is an HTML table generated by the use of <TABLE>, <TD>, </TD>, and </TABLE> tags. A sample HTML file in the style "tables" is presented in Fig. 6.20. As the previous style, this style is also not intended to be used by the database.
- files sldNNN.htm
It is a set of HTML files being graphical forms of foils. A sample sldNNN.htm file and its view in HTML browser are presented in Fig. 6.21. The format of these files is similar to files being PowerPoint presentations converted to HTML format.
|
<HTML>
<HEAD>
<META NAME="generator" CONTENT="PowerPoint Outline(RTF)/WWWfoil to HTML converter">
<!--Global Attributes
-->
<META HTTP-EQUIV="content-type" CONTENT="text/html; charset=iso-9959-1">
<TITLE> Overview foils for NPAC Database Activity including Web March 1995 </TITLE>
</HEAD>
<BODY>
<P>
<FONT SIZE=+2> <B>
Overview foils for NPAC Database Activity including Web March 1995
</FONT> </B>
</P>
<P>
<CENTER>
<TABLE WIDTH=90% BORDER=4>
<TR> <TD VALIGN=top ALIGN=left WIDTH=80%>
<A HREF="tsld000.htm"> <B>Abstract:</B>
Four Related Information Infrastructure Thrusts at NPAC</A>
</TD>
<TD WIDTH=20% ALIGN=center>
<A HREF="sld000.htm">
<IMG SRC="sld000.gif" WIDTH=80 HEIGHT=40 BORDER=0 ALT="Graphics"></A>
</TD> </TR>
<TR> <TD VALIGN=top ALIGN=left WIDTH=80%>
<A HREF="tsld001.htm">
Integrated Database and Web Technologies at NPAC </A>
</TD>
<TD WIDTH=20% ALIGN=center>
<A HREF="sld001.htm">
<IMG SRC="sld001.gif" WIDTH=80 HEIGHT=40 BORDER=0 ALT="Graphics"></A>
</TD> </TR>
<TR> <TD VALIGN=top ALIGN=left WIDTH=80%>
<A HREF="tsld002.htm"> Four Related Information Infrastructure Thrusts at NPAC</A>
</TD>
<TD WIDTH=20% ALIGN=center> <A HREF="sld002.htm">
<IMG SRC="sld002.gif" WIDTH=80 HEIGHT=40 BORDER=0 ALT="Graphics"></A>
</TD> </TR>
</TABLE>
</CENTER>
</P>
</BODY>
</HTML> |
Fig. 6.17. Sample index.htm file generated by the compiler
|
<HTML>
<HEAD>
<META NAME="generator" CONTENT="PowerPoint Outline(RTF)/WWWfoil to HTML converter">
<!--Foil Attributes
-->
<META HTTP-EQUIV="content-type" CONTENT="text/html; charset=iso-9959-1">
<TITLE> Four Related Information Infrastructure Thrusts at NPAC </TITLE>
</HEAD>
<BODY>
<P LEVEL=0 TRANSITION=+0>
<FONT SIZE=4 COLOR=cyan>
Four Related Information Infrastructure Thrusts at NPAC
</FONT>
</P LEVEL=0 TRANSITION=+0>
<P LEVEL=1 TRANSISTION=+1>
Use and Evaluation of Parallel Relational Databases
</P LEVEL=1 TRANSISTION=+1>
<P LEVEL=2 TRANSISTION=+1>
Oracle DB2 Sybase on IBM SP-2 and Oracle on nCUBE
</P LEVEL=2 TRANSISTION=+1>
<P LEVEL=1 TRANSISTION=-1>
High Performance Video and Multimedia Servers
</P LEVEL=1 TRANSISTION=-1>
<P LEVEL=2 TRANSISTION=+1>
InfoVision -- Information, Video, Simulation, Imagery on demand
</P LEVEL=2 TRANSISTION=+1>
<P LEVEL=1 TRANSISTION=-1>
WebWindows -- an informal collaboration of Internet developers
</P LEVEL=1 TRANSISTION=-1>
<P LEVEL=2 TRANSISTION=+1>
(Parallel) Web Servers enhanced with CGI scripts to support a full world-wide distributed operating environment
</P LEVEL=2 TRANSISTION=+1>
<P LEVEL=1 TRANSISTION=-1>
Integration of these three technologies
</P LEVEL=1 TRANSISTION=-1>
<P LEVEL=2 TRANSISTION=+1>
Web Interfaces to Relational Databases
</P LEVEL=2 TRANSISTION=+1>
<P LEVEL=2 TRANSISTION=+0>
Web Interfaces to Multimedia data with relational databases holding text indices for video
</P LEVEL=2 TRANSISTION=+0>
<P> <TABLE>
<TD HEIGHT=100 WIDTH=100> <A HREF="tsld001.htm">Previous</A> </TD>
<TD HEIGHT=100 WIDTH=100> <A HREF="tsld003.htm">Next</A> </TD>
<TD HEIGHT=100 WIDTH=100> <A HREF="sld002.htm">Graphics</A> </TD>
<TD HEIGHT=100 WIDTH=100> <A HREF="index.htm">Contents</A> </TD>
</TABLE> </P>
</BODY>
</HTML> |
Fig. 6.18. Sample tsldNNN.htm file in "paragraphs" style generated by the compiler
</HTML>
Fig. 6.19. Sample tsldNNN.htm file in "bullets" style generated by the compiler
|
<HTML>
<HEAD>
<META NAME="generator" CONTENT="PowerPoint Outline(RTF)/WWWfoil to HTML converter">
<!--Foil Attributes
-->
<META HTTP-EQUIV="content-type" CONTENT="text/html; charset=iso-9959-1">
<TITLE> Four Related Information Infrastructure Thrusts at NPAC </TITLE>
</HEAD>
<BODY>
<P LEVEL=0 TRANSITION=+0>
<FONT SIZE=4 COLOR=cyan>
Four Related Information Infrastructure Thrusts at NPAC
</FONT>
</P LEVEL=0 TRANSITION=+0>
<P>
<TABLE border=3 cellspacing=2 cellpadding=2 width=90%>
<TR> <TD> Use and Evaluation of Parallel Relational Databases </TD> </TR>
<TR> <TD></TD> <TD> Oracle DB2 Sybase on IBM SP-2 and Oracle on nCUBE </TD> </TR>
<TR> <TD> High Performance Video and Multimedia Servers </TD> </TR>
<TR> <TD></TD> <TD> InfoVision -- Information, Video, Simulation, on demand </TD> </TR>
<TR> <TD></TD> <TD> Our servers connected to ATM and ISDN access networks </TD> </TR>
<TR> <TD> WebWindows -- an informal collaboration of Internet developers </TD> </TR>
<TR> <TD></TD> <TD> (Parallel) Web Servers enhanced with CGI scripts to support
a full world-wide distributed operating environment </TD> </TR>
<TR> <TD> Integration of these three technologies </TD> </TR>
<TR> <TD></TD> <TD> Web Interfaces to Relational Databases </TD> </TR>
<TR> <TD></TD> <TD> Relational Databases to store Web Information
fetched (cached) by internet agents </TD> </TR>
<TR> <TD></TD> <TD> Web Interfaces to Multimedia data with relational databases
holding text indices for video </TD> </TR>
</TABLE>
</P>
<P> <TABLE>
<TD HEIGHT=100 WIDTH=100> <A HREF="tsld001.htm">Poprzedni slajd</A> </TD>
<TD HEIGHT=100 WIDTH=100> <A HREF="tsld003.htm">Nast©pny slajd</A> </TD>
<TD HEIGHT=100 WIDTH=100> <A HREF="sld002.htm">Wersja graficzna</A> </TD>
<TD HEIGHT=100 WIDTH=100> <A HREF="index.htm">Spis tre˜ci</A> </TD>
</TABLE> </P>
</BODY>
</HTML> |
Fig. 6.20. Sample tsldNNN.htm file in "tables" style generated by the compiler
|
<HTML>
<HEAD>
<META NAME="generator" CONTENT="PowerPoint Outline(RTF)/WWWfoil to HTML converter">
<!--Foil Attributes
-->
<META HTTP-EQUIV="content-type" CONTENT="text/html; charset=iso-9959-1">
<TITLE> Four Related Information Infrastructure Thrusts at NPAC </TITLE>
</HEAD>
<BODY>
<CENTER>
<TABLE WIDTH=100%>
<TR> <TD WIDTH=100% ALIGN=center>
<IMG SRC="sld002.gif"" WIDTH= HEIGHT= BORDER=0>
</TD> </TR>
<TR> <TD WIDTH=100% ALIGN=center>
<A HREF="sld001.htm"> <IMG SRC=prev.gif BORDER=0 ALT="Previous"></A>
<A HREF="sld003.htm"> <IMG SRC=next.gif BORDER=0 ALT="Next"></A>
<A HREF="tsld002.htm"> <IMG SRC=text.gif BORDER=0 ALT="Text"></A>
<A HREF="index.htm"> <IMG SRC=info.gif BORDER=0 ALT="Contents"></A>
</TD> </TR>
</TABLE>
</CENTER>
</BODY>
</HTML> |
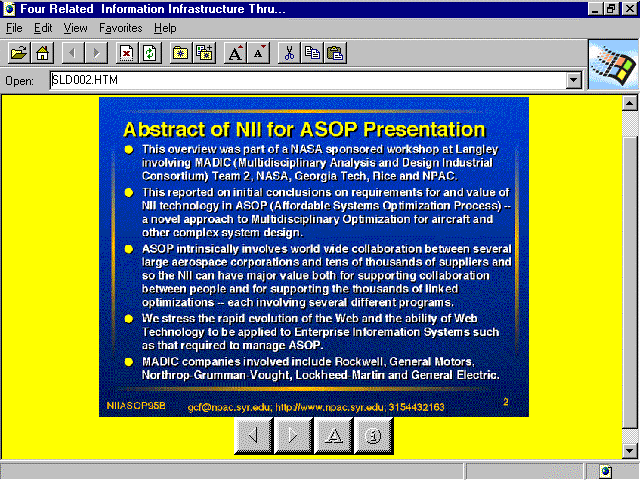
Fig. 6.21. Sample sldNNN.htm file generated by the compiler and its view in HTML browser
The parameters from the configuration file are mapped into sets of database attributes, stored in index.htm and tsldNNN.htm files. The form of each attribute is "attribute_name=attribute_value". A definition of every attribute is included in one line of HTML file. There is a general attribute set for a presentation and an individual set for each foil. These sets are included as HTML comments in <HEAD> elements of the generated HTML files, general set in index.htm file and individual sets in tsldNNN.htm files, respectively. Examples of <HEAD> elements of these files are shown in Fig. 6.22 and Fig. 6.23, respectively.
|
<HTML>
<HEAD>
<META NAME="generator" CONTENT="PowerPoint Outline(RTF)/WWWfoil to HTML converter">
<!--Global Attributes
name=npacdbover
label=NPACDBover
author=Geoffrey C. Fox
runningtitle=Overview of NPAC Database Acivity
signature=Northeast Parallel Architectures Center, Syracuse University
sourcepptdir=/usr/local/archives/public/users/gcf/05/rawfoils/cps616vrml2scriptmar98
body_background_html=technics/clouds.gif
body_bgcolor=yellow
body_text=blue
font_size_title=4
font_color_title_html=cyan
body_link=magenta
body_vlink=red
body_alink=green
hor_image_width=700
hor_image_style=original
ver_image_height=550
ver_image_style=original
-->
<META HTTP-EQUIV="content-type" CONTENT="text/html; charset=iso-9959-1">
<TITLE> Overview foils for NPAC Database Activity including Web March 1995 </TITLE>
</HEAD> |
Fig. 6.22. Attribute sets passed to the database via <HEAD> element in index.htm file
|
<HTML>
<HEAD>
<META NAME="generator" CONTENT="PowerPoint Outline(RTF)/WWWfoil to HTML converter">
<!--Foil Attributes
image=sld002.gif
sound=sld002.ra {seconds=49} {title= Abstract of CPS616-97 Lecture of February 5}
blob_style=useful
-->
<META HTTP-EQUIV="content-type" CONTENT="text/html; charset=iso-9959-1">
<TITLE> Four Related Information Infrastructure Thrusts at NPAC </TITLE>
</HEAD> |
Fig. 6.23. Attribute sets passed to the database via <HEAD> element in sldNNN.htm file
Names of the attributes passed to the database and their meaning are presented in a table below. These attributes are stored in the database and may be directly accessed by the exporter.
|
Name of the attribute |
Type |
Mapped from WebWisdom 1.0 attribute |
Remarks |
|
creation_date |
global |
date |
may be ignored by the database if data format is not recognized properly |
|
version_date |
global |
datemod |
may be ignored by the database if data format is not recognized properly |
|
signature |
global |
signature |
a short text which may be displayed by an exporter as a signature for every foil |
|
body_background_image |
global, foil |
imagebgfile |
a name of an image already stored in the database and used as background for a graphical form of a foil |
|
body_background |
global, foil |
htmlbgfile |
a name of a color from the database used as background color for a foil |
|
body_bgcolor |
global, foil |
bgcolor |
a name of a color from the database used as a value of a "bgcolor" parameter in the <BODY> HTML tag |
|
body_text |
global, foil |
fgcolor |
a name of a color from the database used as a value of a "text" parameter in the <BODY> HTML tag |
|
font_size_table |
global, foil |
intablefontsize |
size of a font while displaying tables |
|
font_size_title |
global, foil |
titlefontsize |
size of a font while displaying titles |
|
font_color_title_html |
global, foil |
htmltitlecolor |
color of a font while displaying titles for text form of a foil |
|
font_color_title_image |
global, foil |
imagetitlecolor |
color of a font while displaying titles for graphical form of a foil |
|
font_color_table |
global, foil |
intablefontcolor |
color of a font while displaying tables |
|
table_bgcolor |
global, foil |
intablebgcolor |
a name of a color from the database used as a background color for tables |
|
body_link |
global, foil |
linkcolor |
a name of a color from the database used as a color of unvisited links |
|
body_vlink |
global, foil |
vlinkcolor |
a name of a color from the database used as a color of visited links |
|
body_alink |
global, foil |
alinkcolor |
a name of a color from the database used as a color of active links |
|
body_link_image |
global, foil |
imagelinkcolor |
a name of a color from the database used as a color of unvisited links for graphical form of a foil |
|
body_vlink_image |
global, foil |
imagevlinkcolor |
a name of a color from the database used as a color of visited links for graphical form of a foil |
|
body_alink_image |
global, foil |
imagealinkcolor |
a name of a color from the database used as a color of active links for graphical form of a foil |
|
body_link_table |
global, foil |
tablelinkcolor |
a name of a color from the database used as a color of unvisited links inside a table |
|
body_vlink_table |
global, foil |
tablevlinkcolor |
a name of a color from the database used as a color of visited links inside a table |
|
body_alink_table |
global, foil |
tablealinkcolor, |
a name of a color from the database used as a color of active links inside a table |
|
hor_image_width |
global, foil |
horizimagewidth |
size of an image (i.e., graphical form of a foil) in horizontal direction |
|
hor_image_style |
global, foil |
horizimagestyle |
a way of displaying images in horizontal direction: native, minimum, maximum, parmvalue |
|
ver_image_height |
global, foil |
vertimagewidth |
size of an image (i.e., graphical form of a foil) in vertical direction |
|
ver_image_style |
global, foil |
vertimagestyle |
a way of displaying images in vertical direction: native, minimum, maximum, parmvalue |
|
image |
foil |
|
in the form "image=file_name", the file name with a foil image generated by PowerPoint is present in the temporary directory |
|
addon |
foil |
|
in the form "addon=sldNNN.adi {title=*}", for details see importing from WebWisdom 1.0 |
|
sound |
foil |
|
in the form "sound=sldNNN.ra {seconds=N}{title=*}{see=*}, where N is a positive integer; for details see importing from WebWisdom 1.0 |
|
blob_style |
foil |
criticalmissing, somemissing, nonemissing |
"blob_style=asHTML" is no information is missing in text form of a foil in comparison to a graphical form; "blob_style=useful" if some information is missing, but this information is not crucial to understand a foil; this parameter is not present while an image must be displayed to understand a foil |
Note that information about bulleting level is included in attributes of the <P> tag (cf. description of the "paragraph" output style above).
After the compilation from RTF to HTML is finished, a new window appears in which a user may display a history of the performed compilation (Fig. 6.24a). Above the history field a message about errors occurred during compilation may be displayed. If there are errors, a user is suggested to read the history for detailed information. If a user presses "Yes" button, the window is extended by a field containing the compilation history (Fig. 6.24b). Once the history is read and "Finished" button is pressed, compiler windows are removed from the screen and control is passed back to the Presentation Loader window. After pressing "Store" button in this window a user goes to the next phase - storing converted HTML files in the database.
a) 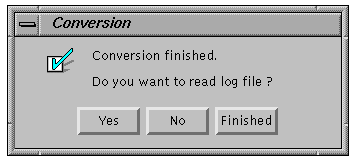 b)
b) 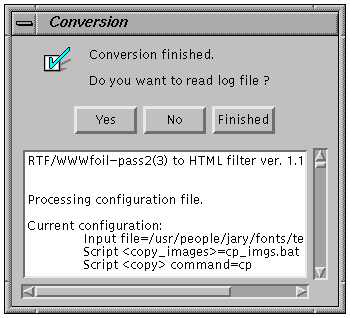
Fig. 6.24. Finishing RTF-to-HTML compilation (a) without and (b) with displaying compilation history
6.2.5. Phase 4 - incorporating HTML files to the database
This phase is similar to the second phase of reading original PowerPoint presentations (c.f. Point 6.1.2), except the "HTML/RTF PowerPoint" directory structure is automatically chosen in the window of the Presentation Loader after pressing "Check" button.
6.3. Importing WebWisdom v.1.0 presentations
To provide backward compatibility with previous versions of WebWisdom, an importing filter is provided to read into the database error-free presentations stored in WebWisdom 1.0 directories. To import WebWisdom 1.0 presentation, some of its files are copied to a temporary directory and then compiled by an importer. The HTML files being result of the compilation are read to the database as succeeding foils of the presentation. After reading, the newly created presentation may be edited, copied, renamed, etc. by the use of the Presentation Manager presented above.
Below the three phases of the importing process are presented: (1) creating a temporary directory and copying files to be imported, (2) compiling files from WebWisdom 1.0 to HTML format, and (3) reading HTML files to the database.
6.3.1. Phase 1 - copying WebWisdom 1.0 presentation to temporary directory
First phase of the importing process is copying to a temporary directory the following files:
- file named processed being a result of wwwfoil pass2(3) program; if this file is not present, the perstemp file is taken into consideration;
- file extrainfo with some additional information about the presentation;
- files NNN.gif and/or NNN,jpg with images for the presentation foils;
- files foilNNN.addoninfo with information about addons;
- files foilNNN.rainfo, foilNNN.ra with information about sounds and the sounds themselves.
During copying, the names of the files are changed according to the table below.
|
WebWisdom 1.0 file |
Temporary file |
|
extrainfo |
beginning part of main translation file (default course.gcf) |
|
processed |
ending part of main translation file |
|
perstemp |
ending part of main translation file, if file processed could not be found |
|
seporgimagedir/NNN.gif
seporgimagedir/NNN.jpg |
file sldNNN.gif or sldNNN.jpg - an image for foil number NNN, NNN=000..999 |
|
addon/foilMMM.addoninfo |
file sldNNN.adi - information about addons for foil number MMM, MMM=0..999 |
|
audio.ra/foilMMM.rainfo |
file sldNNN.rai - information about sound for foil number MMM |
|
audio.ra/foilMMM.ra |
file sldNNN.ra - sound file for foil number MMM |
A UNIX shell script (of type: Bourne /bin/sh or Korn /bin/ksh shell) is provided to automatically perform the following: creating the temporary directory, reading WebWisdom 1.0 files and changing their names (Fig. 6.22). The variables of this script can be changed manually according to user’s requirements and used directory names. To automatically change names of files, which are copied by the script, a special program change_name is provided. This program is always invoked with two parameters. The first one is an original file name, and the second one - a file name extension. The program reads the file name, extract from it the foil number, changes this number into format NNN=000..999, adds a prefix "sld", adds a suffix - a dot with the file extension, and finally prints the result to standard output. For example, an invocation "change_name foil3.addoinfo adi" will result in string "sld003.adi".
|
#!/bin/sh
# Script to copy WebWisdom 1.0 files to a temporary directory
#
# script for copying IMAGES, ADDONS, and SOUNDS from
# wwwfoil directories: <seporgimagedir>, <addon>, <audio.ra>
#
# script attempts to create directory <out_dir>
# and than writes to it files with changed names:
# seporgimagedir\NNN.gif => out_dir\sldNNN.gif
# addon\foilN.addoninfo => out_dir\sldNNN.adi
# audio.ra\foilN.rainfo => out_dir\sldNNN.rai
# audio.ra\foilN.ra => out_dir\sldNNN.ra
#
# in addition, the script copies to the <out_dir> directory
# concatenated files: extrainfo and (processed or perstemp)
# as file out_dir\course.gcf
#
# if the ../scripts directory exists, then it also copies R2H.BAT and R2H.INI
# files on condition that there are no such files in OUT_DIR directory
#
OUT_DIR=wisdom.NT
EXTRA=extrainfo
PROCESS=processed
PERS=perstemp
OUT_GCF=course.gcf
SEP_DIR=seporgimagedir
ADD_DIR=addon
AUD_DIR=audio.ra
DISPLAY=true
#DISPLAY non empty means than file names are displayed
echo "Copying audio/images/sounds from WebWisdom directories to <${OUT_DIR}> v. 1.00."
echo ""
if [ -d ${OUT_DIR} ]
then
echo "Directory <${OUT_DIR}> already exists."
else
mkdir ${OUT_DIR}
fi
if [ -d ${OUT_DIR} ]
then
echo ""
echo "Copying files to <${OUT_DIR}> directory."
if [ -d ${SEP_DIR} ]
then
echo "Copying images from <${SEP_DIR}> directory."
cd ${SEP_DIR}
FILES=`ls ???.gif ???.jpg 2> /dev/null`
cd ..
for i in ${FILES}
do
if [ -z "${DISPLAY}" ]
then
echo " Copying <${SEP_DIR}/${i}> to <${OUT_DIR}/img${i}>."
fi
cp ${SEP_DIR}/${i} ${OUT_DIR}/img${i}
done
if [ -r ./${SEP_DIR}/abstract.gif ]
then
if [ -z "${DISPLAY}" ]
then
echo " Copying <${SEP_DIR}/abstract.gif> to <${OUT_DIR}/img000.gif>"
fi
cp ${SEP_DIR}/abstract.gif ${OUT_DIR}/img000.gif
fi
if [ -r ./${SEP_DIR}/abstract.jpg ]
then
if [ -z "${DISPLAY}" ]
then
echo " Copying <${SEP_DIR}/abstract.jpg> to <${OUT_DIR}/img000.jpg>"
fi
cp ${SEP_DIR}/abstract.jpg ${OUT_DIR}/img000.jpg
fi
else
echo "Warning: directory <${SEP_DIR}> does not exist, no files were copied."
fi
if [ -d ${ADD_DIR} ]
then
echo "Copying addon information from <${ADD_DIR}> directory."
cd ${ADD_DIR}
FILES=`ls foil*.addoninfo 2> /dev/null`
cd ..
for i in ${FILES}
do
if [ -z "${DISPLAY}" ]
then
echo " Copying <${ADD_DIR}/${i}> to <${OUT_DIR}/`change_name ${i} adi`>."
fi
cp ${ADD_DIR}/${i} ${OUT_DIR}/`change_name ${i} adi`
done
else
echo "Warning: directory <${ADD_DIR}> does not exist, no files were copied."
fi
if [ -d ${AUD_DIR} ]
then
echo "Copying sound information from <${AUD_DIR}> directory."
cd ${AUD_DIR}
FILES=`ls foil*.rainfo 2>/dev/null`
cd ..
for i in ${FILES}
do
if [ -z "${DISPLAY}" ]
then
echo " Copying <${AUD_DIR}/${i}> to <${OUT_DIR}/`change_name ${i} rai`>."
fi
cp ${AUD_DIR}/${i} ${OUT_DIR}/`change_name ${i} rai`
done
echo "Copying sounds from <${AUD_DIR}> directory."
cd ${AUD_DIR}
FILES=`ls foil*.ra 2>/dev/null`
cd ..
for i in ${FILES}
do
if [ -z "${DISPLAY}" ]
then
echo " Copying <${AUD_DIR}/${i}> to <${OUT_DIR}/`change_name ${i} ra`>."
fi
cp ${AUD_DIR}/${i} ${OUT_DIR}/`change_name ${i} ra`
done
else
echo "Warning: directory <${AUD_DIR}> does not exist, no files were copied."
fi
rm -f ${OUT_DIR}/${OUT_GCF}
if [ -r ${EXTRA} ]
then
echo "Copying <${EXTRA}> file as beginning part of <${OUT_GCF}>."
cp ${EXTRA} ${OUT_DIR}/${OUT_GCF}
else
echo "File <${EXTRA}> not found."
fi
if [ -r ${PROCESS} ]
then
echo "Copying <${PROCESS}> file as ending part of <${OUT_GCF}>."
cat ${PROCESS} >>${OUT_DIR}/${OUT_GCF}
else
echo "File <${PROCESS}> not found, trying to get <${PERS}>."
if [ -r ${PERS} ]
then
echo "Copying <${PERS}> file as ending part of <${OUT_GCF}>."
cat ${PERS} >>${OUT_DIR}/${OUT_GCF}
else
echo "File <${PERS}> not found."
fi
fi
if [ -d "../scripts" ]
then
if [ -r "${OUT_DIR}/R2H.INI" ]
then
echo "File R2H.INI not overwritten."
else
echo "Copying file R2H.INI."
cp ../scripts/r2h.ini ${OUT_DIR}
fi
if [ -r "${OUT_DIR}/R2H.BAT" ]
then
echo "File R2H.BAT not overwritten."
else
echo "Copying file R2H.BAT."
cp ../scripts/r2h.bat ${OUT_DIR}
fi
echo "Copying PowerPoint-like icons."
cp ../scripts/*.gif ${OUT_DIR}
fi
else
echo "Cannot create ${OUT_DIR} directory, exiting."
fi |
|
Fig. 6.25. UNIX script to copy WebWisdom 1.0 files to a temporary directory
The script performs all the necessary copying and changing of file names. Moreover, it copies to a temporary directory a script to invoke the compiler together with its configuration file. The execution of the script finishes the first phase of the importing. Note that the names of "output" files are crucial to perform the second phase of importing. Neither the file names for images and sounds, nor the file names for addon- and sound-info can be changed. Thus, it is recommended to run the script to perform copying and changing file names properly, and avoid manual copying and changing file names.
6.3.2. Phase 2 - compiling WebWisdom 1.0 presentation to HTML format
The second stage of the importing process is compilation. Copied temporary files are read by the compiling program and processed according to the rules written in configuration file (Fig. 6.26). As a result, a set of HTML files is created. For the whole presentation, an index,htm file is created as an index to all generated foils. For each processed foil, two HTML files: tsldNNN.htm (text form of a foil) and sldNNN.htm (graphical form, i.e. a file with direct link to a foil image) are generated. Only the first file is incorporated into the database. The second one is provided only to provide compatibility with a directory structure generated by the standard converter from PowerPoint to HTML format. Thus, the created set of HTML files can be used as a standalone presentation, in the same way the translated PowerPoint presentation can be used.
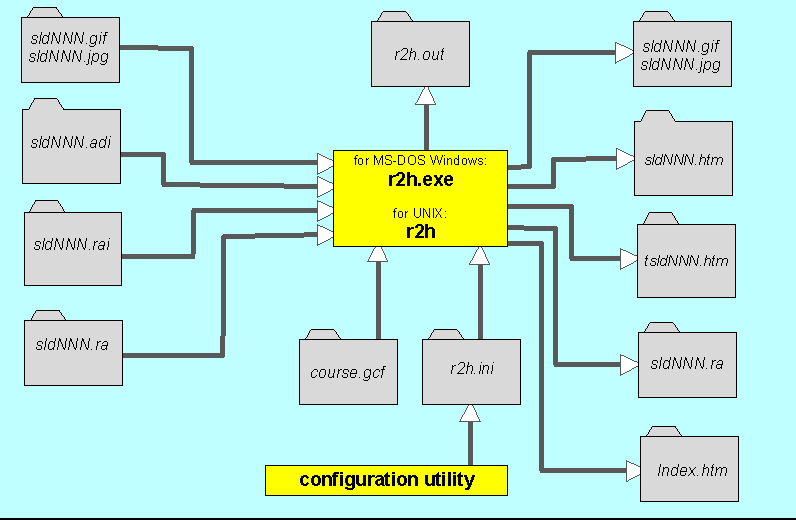
Fig. 6.26. Files read and written during second phase of the importing process
In WebWisdom 1.0 system some image files may be shared by multiple presentations. In such case, if a given image is marked as imported from other presentation, a special shell script (Bourne shell script) is generated by the compiler to perform the copying. If after compilation the script is not empty, i.e. there is still at least one image file to be copied, a warning message appears after compilation. A user should then verify the generated script and run it to copy the necessary images to the temporary directory. Next, the compiler must be run once again to include the newly copied images into the HTML files (this means the second phase is repeated once again). This process should be repeated until all images are included in the temporary directory, i.e. the script for copying images is empty and there is no warning message after compilation. The sample script for copying images is presented in Fig. 6.27.
|
!/bin/sh
#
#UNIX Bourne shell script to copy images from other directories
#
OUT_DIR=.
CP=cp
${CP} ../npacresources/june97/sandiego/cps615audio.gif ${OUT_DIR}/sld074.gif
${CP} ../npacresources/june97/sandiego/cps615f95.gif ${OUT_DIR}/sld075.gif
${CP} ../npacresources/june97/sandiego/ecs400f96.gif ${OUT_DIR}/sld079.gif
${CP} ../npacresources/june97/sandiego/ecs400s96.gif ${OUT_DIR}/sld080.gif
${CP} ../npacresources/june97/sandiego/foil_javascriptvpl.gif ${OUT_DIR}/sld081.gif
${CP} ../npacresources/june97/sandiego/foil_perlvpl.gif ${OUT_DIR}/sld082.gif
${CP} ../npacresources/june97/sandiego/woj_sls_faculty.gif ${OUT_DIR}/sld089.gif
${CP} /home/A7F/gcf/foils/npacresources/june97/vpl/compile.gif ${OUT_DIR}/sld090.gif
${CP} /home/A7F/gcf/foils/npacresources/june97/vpl/compile2.gif ${OUT_DIR}/sld091.gif
${CP} /home/A7F/gcf/foils/npacresources/june97/vpl/execute.gif ${OUT_DIR}/sld092.gif
${CP} /home/A7F/gcf/foils/npacresources/june97/vpl/execute2.gif ${OUT_DIR}/sld093.gif
${CP} /home/A7F/gcf/foils/npacresources/june97/vpl/io-summary.gif ${OUT_DIR}/sld094.gif
${CP} /home/A7F/gcf/foils/npacresources/june97/vpl/jpvs.gif ${OUT_DIR}/sld095.gif
${CP} /home/A7F/gcf/foils/npacresources/june97/vpl/jpvs2.gif ${OUT_DIR}/sld096.gif
${CP} /home/A7F/gcf/foils/npacresources/june97/vpl/kiviat.gif ${OUT_DIR}/sld097.gif
${CP} /home/A7F/gcf/foils/npacresources/june97/vpl/pvm-vm.gif ${OUT_DIR}/sld098.gif
${CP} /home/A7F/gcf/foils/npacresources/june97/vpl/ut-anim.gif ${OUT_DIR}/sld099.gif
${CP} /home/A7F/gcf/foils/npacresources/june97/vpl/ut-count.gif ${OUT_DIR}/sld100.gif |
Fig. 6.27. Sample script for copying image files from other directories
The output generated by the compiler is similar to the one generated while importing RTF-based PowerPoint presentation (cf. previous section).
The main presentation file is a set of commands in wwwfoil-pass2(3) format. The meaning of each processed command is presented in the table below.
|
Wwwfoil command |
Meaning |
Possible values |
Defaults |
|
contd |
continuing previous command |
"*" |
|
|
titleset |
command passed directly to the database |
"*" |
"" |
|
signature |
command passed directly to the database |
"*" |
"" |
|
title |
command passed directly to the database |
"*" |
"" |
|
criticalmissing |
command passed directly to the database |
|
|
|
somemissing |
command passed directly to the database |
|
|
|
beginfoil |
beginning of the foil definition |
|
|
|
endfoil |
ending of the foil definition |
|
|
|
bulletN |
bullet level N |
"*" |
"" |
|
getimagefrom |
argument of the command is copied to the <copy_images> script as source directory/file name |
"*" |
"" |
|
noimageversion |
command inhibits reading an image from sldNNN.gif(jpg) file |
|
|
|
setimagebgfile
imagebgfile |
name of the file set as background for the graphics form of all the foils from the presentation |
"*" |
"" |
|
foilimagebgfile |
name of the file set as a background for the graphics form of the foil |
"*" |
"" |
|
sethtmlbgfile
htmlbgfile |
name of the file set as a background for the text form of all the foils from the presentation |
"*" |
"" |
|
foilhtmlbgfile |
name of the file set as background for the text form of the foil |
"*" |
"" |
|
intablefontsize |
font size for the table inside a foil for each foil from the presentation |
"1..7" |
"" |
|
foilintablefontsize |
font size for the table inside a foil |
"1..7" |
"" |
|
titlefontsize |
font size for the foil title for each foil of the presentation |
"1..7" |
"" |
|
foiltitlefontsize |
font size for the foil title |
"1..7" |
"" |
|
bgcolor |
background color for each foil of the presentation |
"*" |
"" |
|
foilbgcolor |
background color for the foil |
"*" |
"" |
|
intablebgcolor |
background color for the tables inside a foil for each foil of the presentation |
"*" |
"" |
|
foilintablebgcolor |
background color for the tables inside a foil |
"*" |
"" |
|
fgcolor |
text color for each foil of the presentation |
"*" |
"" |
|
foilfgcolor |
text color for the foil |
"*" |
"" |
|
htmltitlecolor |
title color for each text foil of the presentation |
"*" |
"" |
|
foilhtmltitlecolor |
title color for the text foil |
"*" |
"" |
|
intablefontcolor |
text color for the table for each foil of the presentation |
"*" |
"" |
|
foilintablefontcolor |
text color for the table |
"*" |
"" |
|
imagetitlecolor |
title color for each graphical foil of the presentation |
"*" |
"" |
|
foilimagetitlecolor |
title color for the graphical foil |
"*" |
"" |
|
linkcolor |
link color for each foil of the presentation |
"*" |
"" |
|
foillinkcolor |
link color for the foil |
"*" |
"" |
|
alinkcolor |
active link color for each foil of the presentation |
"*" |
"" |
|
foilalinkcolor |
active link color for the foil |
"*" |
"" |
|
vlinkcolor |
visited link color for each foil of the presentation |
"*" |
"" |
|
foilvlinkcolor |
visited link color for the foil |
"*" |
"" |
|
imagelinkcolor |
link color for the graphical form for each foil of the presentation |
"*" |
"" |
|
foilimagelinkcolor |
link color for the graphical foil |
"*" |
"" |
|
imagealinkcolor |
active link color for the graphical form for each foil of the presentation |
"*" |
"" |
|
foilimagealinkcolor |
active link color for the graphical foil |
"*" |
"" |
|
imagevlinkcolor |
visited link color for the graphical form for each foil of the presentation |
"*" |
"" |
|
foilimagevlinkcolor |
visited link color for the graphical foil |
"*" |
"" |
|
tablelinkcolor |
link color for the "table-like" foil for each foil of the presentation |
"*" |
"" |
|
foiltablelinkcolor |
link color for the "table-like" foil |
"*" |
"" |
|
tablealinkcolor |
active link color for the "table-like" foil for each foil of the presentation |
"*" |
"" |
|
foiltablealinkcolor |
active link color for the "table-like" foil |
"*" |
"" |
|
tablevlinkcolor |
visited link color for the "table-like" foil for each foil of the presentation |
"*" |
"" |
|
foiltablevlinkcolor |
visited link color for the "table-like" foil |
"*" |
"" |
|
horizimagewidth |
horizontal size of the foil image for each foil of the presentation |
"NNNN" |
"" |
|
foilhorizimagewidth |
horizontal size of the foil image |
"NNNN" |
"" |
|
horizimagestyle |
type of setting size of foil image for each foil of the presentation; if does not set to "native", the "horizimagewidth" command is taken into consideration |
"maximum", "minimum", "native", "parmvalue", |
"native" |
|
foilhorizimagestyle |
type of setting size of foil image; if does not set to "native", the "foilhorizimagewidth" command is taken into consideration |
"maximum", "minimum", "native", "parmvalue", |
"native" |
|
vertimagewidth |
vertical size of the foil image for each foil of the presentation |
"NNNN" |
"" |
|
foilvertimagewidth |
vertical size of the foil image |
"NNNN" |
"" |
|
vertimagestyle |
type of setting size of foil image for each foil of the presentation; if does not set to "native", the "vertimagewidth" command is taken into consideration |
"maximum", "minimum", "native", "parmvalue", |
"native" |
|
foilvertimagestyle |
type of setting size of foil image; if does not set to "native", the "foilvertimagewidth" command is taken into consideration |
"maximum", "minimum", "native", "parmvalue", |
"native" |
|
sourcepptdir |
name of the directory with source PowerPoint file |
"*" |
"" |
|
html |
command ignored |
|
|
|
endhtml |
command ignored |
|
|
|
name |
command ignored |
|
|
|
label |
command ignored |
|
|
|
author |
command ignored |
|
|
|
addsource |
command ignored |
|
|
|
abstract |
command ignored |
|
|
|
master |
command ignored |
|
|
|
script |
command ignored |
|
|
|
abstractsource |
command ignored |
|
|
|
runningtitle |
command ignored |
|
|
|
event |
command ignored |
|
|
|
date |
command ignored |
|
|
|
datemod |
command ignored |
|
|
|
seealso |
command ignored |
|
|
|
htmlline |
command ignored |
|
|
|
bulletsongif |
command ignored |
|
|
|
bestfoilseturl |
command ignored |
|
|
As for importing from RTF-based PowerPoint presentations (cf. previous section), the parameters listed in the WebWisdom 1.0 command table and the configuration file are mapped into sets of appropriate database attributes. The form of each attribute is "attribute_name=attribute_value". A definition of every attribute is included in one line of HTML file. There is a general attribute set for a presentation and an individual set for each foil. These sets are included as HTML comments in <HEAD> elements of the generated HTML files, general set in index.htm file and individual sets in tsldNNN.htm files, respectively.
Names of the attributes passed to the database and their meaning are presented in table below. Some details about attributes can be found in the previous section (see Point 6.2.3).
|
Name of the attribute |
Type |
Mapped from WebWisdom 1.0 attribute |
Remarks |
|
signature |
global |
signature |
see Point 6.2.3 |
|
body_background_image |
global, foil |
imagebgfile |
see Point 6.2.3 |
|
body_background |
global, foil |
htmlbgfile |
see Point 6.2.3 |
|
body_bgcolor |
global, foil |
bgcolor |
see Point 6.2.3 |
|
body_text |
global, foil |
fgcolor |
see Point 6.2.3 |
|
font_size_table |
global, foil |
intablefontsize |
see Point 6.2.3 |
|
font_size_title |
global, foil |
titlefontsize |
see Point 6.2.3 |
|
font_color_title_html |
global, foil |
htmltitlecolor |
see Point 6.2.3 |
|
font_color_title_image |
global, foil |
imagetitlecolor |
see Point 6.2.3 |
|
font_color_table |
global, foil |
intablefontcolor |
see Point 6.2.3 |
|
body_bgcolor_table |
global, foil |
intablebgcolor |
see Point 6.2.3 |
|
body_link |
global, foil |
linkcolor |
see Point 6.2.3 |
|
body_vlink |
global, foil |
vlinkcolor |
see Point 6.2.3 |
|
body_alink |
global, foil |
alinkcolor |
see Point 6.2.3 |
|
body_link_image |
global, foil |
imagelinkcolor |
see Point 6.2.3 |
|
body_vlink_image |
global, foil |
imagevlinkcolor |
see Point 6.2.3 |
|
body_alink_image |
global, foil |
imagealinkcolor |
see Point 6.2.3 |
|
body_link_table |
global, foil |
tablelinkcolor |
see Point 6.2.3 |
|
body_vlink_table |
global, foil |
tablevlinkcolor |
see Point 6.2.3 |
|
body_alink_table |
global, foil |
tablealinkcolor, |
see Point 6.2.3 |
|
hor_image_width |
global, foil |
horizimagewidth |
see Point 6.2.3 |
|
hor_image_style |
global, foil |
horizimagestyle |
see Point 6.2.3 |
|
ver_image_height |
global, foil |
vertimagewidth |
see Point 6.2.3 |
|
ver_image_style |
global, foil |
vertimagestyle |
see Point 6.2.3 |
|
image |
foil |
|
in the form "image=file_name", the file name with image must be present in the temporary directory |
|
addon |
foil |
copied from file foilN.addoinfo |
in the form "addon=sldNNN.adi {title=*}" |
|
sound |
foil |
copied from file foilN.rainfo |
in the form "sound=sldNNN.ra {seconds=N}{title=*}{see=*}, where N is a positive integer |
|
blob_style |
foil |
criticalmissing, somemissing, nonemissing |
"blob_style=asHTML" for nonemissing, "blob_style=useful" for somemissing), not present for criticalmissing |
|
seealso |
foil |
seealso |
ignored by the database |
|
name |
global |
name |
ignored by the database |
|
label |
global |
label |
ignored by the database |
|
author |
global |
author |
ignored by the database |
|
addsource |
global |
addsource |
ignored by the database |
|
runningtitle |
global |
runningtitle |
ignored by the database |
|
event |
global |
event |
ignored by the database |
|
creation_date |
global |
date |
may be ignored by the database if data format is not recognized properly |
|
version_date |
global |
datemod |
may be ignored by the database if data format is not recognized properly |
|
sourcepptdir |
global |
sourcepptdir |
ignored by the database, although a message is printed by r2h compiler to take a look in this directory and copy manually PowerPoint source file to the temporary directory |
Note that information about bullets (WebWisdom 1.0 command BulletN, where N=1..9) is included in attributes of the <P> tag (cf. description of the "paragraph" output style in the previous section).
6.3.3. Phase 3 - incorporating contents of the temporary directory to the database
The temporary directory prepared in the first two phases is passed to the third phase and its content is read into the database. This task is similar to importing PowerPoint and RTF-based presentations, except some foils may have no graphical forms, i.e., no file with an image is associated with the foil. In such a case an "empty" image is displayed while storing foils into the database (Fig. 6.28).
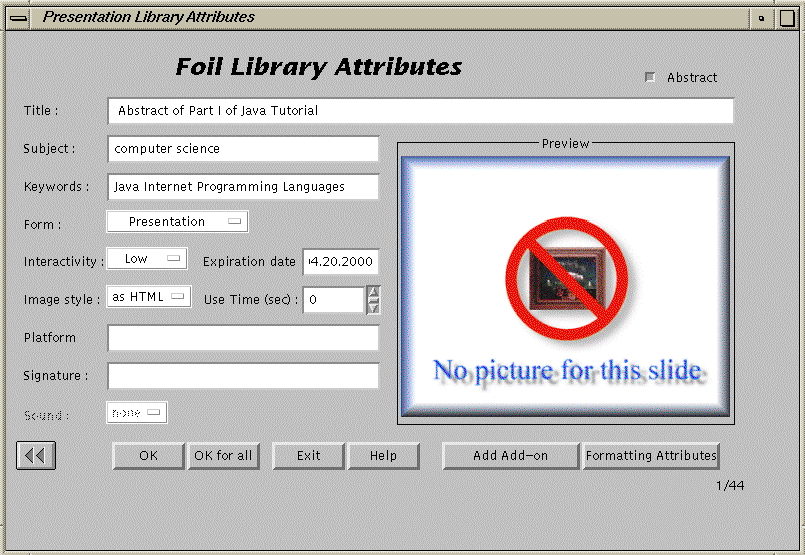
Fig. 6.28. Setting attributes for a text-only foil of a WebWisdom 1.0 presentation being imported
to the database
7. Exporter
Reading presentations from the database is always a two-step process. In the first step, a user connects to a template, which is a formatter for the presentation (i.e., a sequence of foils generated by the database). In the second step, the template connects to the database, reads a foil in a given form (text, image, applet, etc.), formats the foil and sends it back to HTML browser. The second step is invisible for ordinary users, so in this chapter only the first step is described for one sample template. To get some information about templates one must refer to "WebWisdom NT technical notes".
To read a presentation from the database, a user may use any HTML browser, e.g. Netscape Communicator or Microsoft Internet Explorer. After connecting the database, a welcome page is displayed (Fig. 7.1). A user is requested to write down his name and current password. If the name is unknown for the database, or the password is wrong, a message is displayed "Password incorrect, authorization failed". The user must verify the name and the password and try to log-in once again.
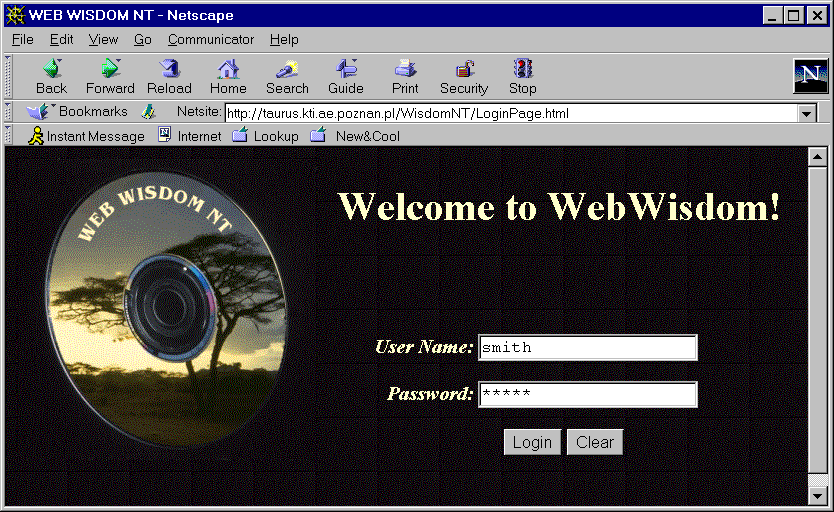
Fig. 7.1. Welcome page of a sample template
If the name and the password are correct, a new page is invoked in which the foilworld hierarchy is displayed (Fig. 7.2). A user may navigate in the hierarchy to find the foilworld which contains a presentation he would like to see. When a foilword is found, the user clicks on it to display its contents. Presentations from the selected foilworld are displayed in the form: title, subject (i.e., knowledge domain of the presentation, e.g. physics, computer science, etc.), and number of foils in the presentation (Fig. 7.3). By the presentations three buttons are present. "HTML" button means that the presentation should be displayed in a text form. "IMAGE" button means the presentation should be displayed in graphical form, and "MIXED" button - the foils of the presentation should be displayed in text forms if they do not differ substantially from graphical form (cf. Chapter 5 and 6, property image_type). By clicking on a given button of the presentation a user opens this presentation and begins to browse its contents in text, graphical or mixed form (Fig. 7.4).
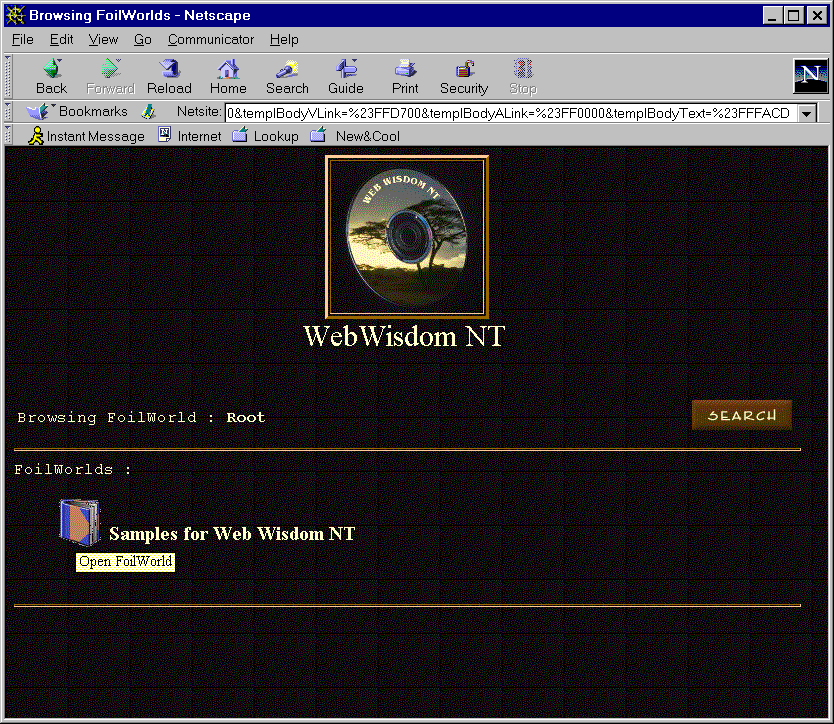
Fig. 7.2. Root of the foilworld hierarchy displayed by the template
Fig. 7.3. Contents of a foilworld displayed by the template
Fig. 7.4. Contents of a presentation displayed by the template
Once a presentation is selected, its contents is displayed. In the upper frame of the page a title of the presentation is displayed, as well as a foilword the presentation belongs to. In the upper-right corner of the page two icons are displayed: after clicking on a "book" icon a user goes back to the page with a contents of a foilworld, while after clicking on "logo" icon a user logs-out and the welcome page is displayed (cf. Fig. 7.1).
In the central frame of the page a contents of a given foil is displayed. If no foil has been loaded, a message is displayed "No foil loaded".
In the left frame of the page a list of foil titles is displayed. By clicking to a given title, a contents of the corresponding foil is displayed in the central frame (Fig. 7.5).
Fig. 7.5. Displaying contents of a given foil in graphical form
By clicking "IMG/HTML" button located in the down part of the central frame, a user may switch between graphical (Fig. 7.5) and text form of the selected foil (Fig. 7.6).
Fig. 7.6. Displaying contents of a given foil in text form
If an add-on (i.e., a URL address with additional information for the foil, cf. Chapter 5 and 6) for a selected foil is present, a frame labeled „addons" contains its title. By clicking this title, a user may invoke a new window with a page addressed by the selected add-on (Fig. 7.7).
Fig. 7.7. A contents of a sample add-on
The add-on may be also defined for the whole presentation. In such a case, their corresponding buttons are displayed after the list of foil titles, in the lower-left frame of the page. Note that there may be several add-ons for the presentations and several add-ons for given foils.
8. Technical notes
8.1. Installation of the WebWisdom NT system
Installation of the
WebWisdom NT system can be divided into five tasks:
- creation of Oracle user account,
- creation of database schema,
- initial database filling,
- installation of WebWisdom Manager,
- installation and configuration of Netscape Enterprise Server
- installation and configuration of
WebWisdom NT Template(s).
8.1.1. Creation of Oracle’s user account
WebWisdom NT
system operates on one database user account. The account name and password used by Wisdom Manager can be modified in the login window by a privileged user (root or admin) – see Chapter 2 for details. User account used by Exporter can be modified in the template configuration file: wisdomnt.conf - see Section 8.1.5 for details. In general, the same database user should be used for schema creation, initial database filling, and later by the Managers and the Exporter. In the succeeding description this specific database user is called "webwisdom user".
To create a database user account for
WebWisdom NT system, Oracle Security Manager can be used. Database user name and user password must be provided. User privileges should include at least "connect" and "resource" standard roles, and "unlimited tablespace" privilege.
8.1.2. Creation of database schema
WebWisdom database schema is created by a list of SQL commands executed from Oracle’s SQL*Plus.
Before starting the database schema creation process, database administrator should copy appropriate files into a directory accessible by SQL*Plus (e.g. .../oracle/bin). The following files should be copied:
wisdom.sql - main scheme creation file,
wisdom.tab - file containing table creation commands,
wisdom.seq - file containing sequence creation commands,
wisdom.con - file containing constraint commands.
To create the database schema, the database administrator should login to the Oracle Database System by the use of SQL*Plus as the webwisdom user and enter the following command:
If the command executes successfully, the WebWisdom database schema is created.
The next step is initial database filling described below.
8.1.3. Initial database filling
WebWisdom NT
system requires that some initial data are entered into the database before the system can start running. Example data include: colors, mime_types, properties, root user account, root foilworld, help files, etc. Initial database filling is performed partially by SQL commands, partially by external Java programs. External Java programs are used for data-types non-manageable directly by SQL*Plus (e.g., images or HTML files).
The whole database filling procedure is divided into four steps:
step 1: filling colors, forms, and mime-types,
step 2: filling images,
step 3: filling users and properties,
step 4: filling "help" files and images.
Step 1 - filling colors, forms, and mime-types
The following files are required during this phase:
fill1.sql,
insert_mimetypes.sql,
insert_forms.sql,
insert_colors.sql.
All these files should be copied to a directory which is accessible by SQL*Plus (e.g., .../oracle/bin). To complete this step user should enter the following command in SQL*Plus:
During this phase the following data are entered to the database: used MIME types, used presentation forms (cf. Presentation Manager and setting properties in Section 5), and color names and their RGB definitions. After successful execution all database changes should be committed:
Step 2 - filling images
This step is performed by a standalone Java program. This program reads image files and stores images into the database.
To simplify the configuration process, the program stores only one image at a time and it is invoked by script images.bat. This script contains commands in the following format:
|
set CLASSPATH=.;..\..\classes111.zip
java StoreImage FileName1.gif DatabaseImageName user/password@hostname:1521:ORCL
java StoreImage FileName2.gif AnotherName user/password@hostname:1521:ORCL
... |
StoreImage is the name of a Java program used to store images. This program requires three parameters: image file name, database image name, and connection string. The database image name must be unique – no two images with the same database image name can be stored into the database.
After successful image storing next phase – filling users and properties – can be performed.
Step 3 - filling users and properties
During this phase the following data are entered to the database:
- users (root user, and two example users: w and wisdom),
- color and image properties used by an example template, and
- general properties.
This phase is a SQL phase and can be performed from SQL*Plus. The following command should be entered after logging in as the webwisdom user:
The following files are required during this phase:
fill2.sql,
insert_users.sql,
insert_color_image_prop.sql,
insert_general_prop.sql.
All these files should be copied to a directory accessible by SQL*Plus (e.g. .../oracle/bin).
After successful completion of this phase, help data can be stored in the way described below.
Step 4 - filling "help" files and images
During this phase help HTML files, help images and help anchors are stored. First two categories are stored by the use of external programs. The last category – help anchors – are stored by the use of SQL commands. First, help files and images must be stored to enable creation of help anchors.
Help files, images and anchors are created automatically from the documentation (i.e., this text). The documentation in Microsoft Word 97 format is first converted to HTML format. As a result, one HTML file is generated and a set of GIF images. The HTML file is parsed by help compiler (program hc.exe invoked with no parameters in the directory the HTML file is located) and divided into chapters, each chapter in a separate, HTML-like file.
During help compilation, three files are automatically generated. The first one rc.out is a compilation history and list of errors and warnings. This file should be checked after compilation if there was no fatal error. The second file, DOS script help.bat, contains list of commands, each one executing either StoreHelpFile or StoreHelpImage Java program:
|
set CLASSPATH=.;..\..\classes111.zip
java StoreHelpFile help0.htm 0 user/password@host:1521:ORCL
java StoreHelpFile help1.htm 1 user/password@host:1521:ORCL
...
java StoreHelpImage Image163.gif user/password@host:1521:ORCL
java StoreHelpImage Image164.gif user/password@host:1521:ORCL
... |
StoreHelpFile program requires three parameters: help file name, help file identifier (unique number generated by the help compiler), and connection string.
StoreHelpImage requires two parameters: image file name, and connection string.
Defining help anchors is performed from SQL*Plus after successful storage of all help files and help images. All SQL commands needed by this task are contained in help.sql file, third file generated during help compilation. This file should be copied to a directory accessible by SQL*Plus (e.g., .../oracle/bin). To start this phase the following command should be entered in SQL*Plus after logging in as the webwisdom user:
This is the last phase of the initial database filling process. It should be ended by committing of all database changes:
At this point
WebWisdom NT database is ready to use. The Managers and the Exporter can be used to fill and manage the database contents and for data retrieval. See Section 8.1.4 for details on how to configure Manager database connection, and Section 8.1.5 on how to configure the Exporter (templates).
8.1.4. Installation of WebWisdom Manager
To install the WebWisdom Manager (i.e., the Managers, the Presentation Loader and the Maintenance Tools including RTF-to-HTML compiler with its configuration utility) one must chose the directory and copy to it the contents of /manager directory from the installation disk (CD-ROM). The copied files include Java program, RTF-to-HTML compiler r2h executables (for both DOS/Windows and IRIX operating systems) and shell scripts required to run the system. No other installation procedures are needed to complete this step of the installation of WebWisdom NT system.
To start WebWisdom Manager on PC systems run.bat script should be used. To run it on IRIX systems run.sh Bourne shell script should be used.
8.1.5. Installation and configuration of Netscape Enterprise Server
WebWisdom NT
system requires that Netscape Enterprise Server v. 3.5.1 or later is installed. System administrator installing the server should make sure that the following options are set properly:
Programs
Java
Activate the Java interpreter? è
Yes
Programs
Server Javascript
Activate the Server Side Javascript application environment? è
Yes
After successful installation of Netscape Enterprise Server v.3.5.1, required
WebWisdom NT server extensions must be installed. These extensions are used by WebWisdom applications to retrieve non-trivial data types from the database (e.g., images, sounds, HTML files, PowerPoint sources, etc.). Extensions are implemented in a general way allowing retrieval of any type of data from the database.
There are two extensions: getraw and getrawsoc. Both of them are server-applets written in Java.
Getraw extension can be used to retrieve data from a database that is installed on the same host the Netscape Enterprise Server is.
Getrawsoc extension can be used to retrieve data from a database that is installed on any host. Getrawsoc requires, however, that an additional program – a deamon getrawsocd is running on the same host. This requirement is a result of limited JDBC implementation in Netscape Enterprise Server 3.5.1, which allow to contact only databases running on the same host. Possibly with newer versions of the server, the daemon can be excluded.
The system administrator should decide which extension will be used and install it or install both of them.
The following files form the getraw extension:
- Getraw.java,
- Constants.java,
- Getraw.class,
- Constants.class.
The following files form the getrawsoc extension:
- Getraw.java,
- Constants.java,
- Getraw.class,
- Constants.class.
Appropriate *.class files (depending on whether getraw, getrawsoc, or both extensions are going to be used) should be copied to appropriate Enterprise Server „plugin" directory. Example directory can be:
\netscape\suitespot\plugins\Java\applets
For the extensions to be installed properly the Netscape Enterprise Server should be restarted. System administrator should make sure that the Enterprise Server can access required Oracle Java classes (file classes111.zip).
Getraw and getrawsoc extensions use two configuration files:
- wisdom_users.conf – containing list of connections to databases,
- wisdom_tables.conf – containing list of table names that are excluded for getraw and getrawsoc (for security reasons).
These files should be copied to appropriate Netscape Enterprise configuration directory, e.g.:
\netscape\suitespot\https-servername\config
The wisdom_users.conf file contains a list of database connections that can be used by getraw or getrawsoc utilities. The file has the following format:
|
connection_identifier|user_name|password|host_name|port_no|database_name |
where:
connection_identifier is the name the connection will be identified in URL,
user_name – user name used to access the database,
password – password for database user name,
host_name – host name of the server the database system is running,
port_no – port number used by JDBC to connect to the database,
database_name – name of the database.
For example, a file:
|
1|user1|password1|host.dns.domain.edu|1521|ORCL
second|wisdom|wpas33|hostname|1521|ORCL
3|test|test|kopernik.npac.syr.edu|1521|ORCL |
defines three different connections: „1", „second", and „3".
The wisdom_tables.conf file contains a list of table names that should not be accessed by getraw and getrawsoc server extensions.
Contents of a sample wisdom_tables.conf file can be the following:
|
users
presentation
foilworld
access_to_foilworld |
Both wisdom_users.conf and wisdom_tables.conf can be modified "on-the-fly" without restarting the Enterprise Server.
Getrawsoc utility requires that the getrawsocd daemon is running on the same host. The following files belong to the daemon:
- getrawsocd.java,
- constants.java,
- getrawsocd.class,
- constants.class,
- daemon.bat,
- daemonv.bat,
These files can be installed anywhere.
The daemon.bat file is an example file that can be used to start the daemon in normal mode in NT environment. The daemonv.bat starts the daemon in verbose mode allowing system administrator to verify database queries.
Getraw and getrawsoc utilities can be used to retrieve data from the database by the use of standard URL addresses. Every attribute in the database can be addressed by an URL in the following format:
http://server_name/server-java/getraw/connection_id/ table_name/attribute_name/query_condition/ mime_major/mime_minor/file_name
where:
- server_name is the name of the server,
- connection_id is the connection identifier specified in the wisdom_users.conf file,
- table_name is the name of the table to be accessed (providing that it is not listed in wisdom_tables.conf file),
- attribute_name is the name of the table attribute to be retrieved,
- query_condition is an SQL-like condition in URL-encoded format,
- mime_major is the major mime type that should be returned by the server,
- mime_minor is the minor mime type that should be returned by the server,
- file_name is the file name returned by the server.
For example, the following URL:
|
http://host/server-java/getraw/wisdom1/image/data/iid%3d1/image/gif/a.gif |
will cause the getraw to retrieve "data" attribute value from the "image" table where "iid=1" and return the result with mime type "image/gif" and file name "a.gif".
8.1.6. Installation and configuration of the Exporter (templates)
To install a
WebWisdom NT template the following software is required:
- Netscape Enterprise Server version 3.5.1 or later,
- Netscape Administration Server version 3.5 or later,
- optionally Netscape Visual JavaScript version 1.0 or later could be installed.
A template can be installed either manually or by the use of Netscape Visual JavaScript environment. To install a template manually, the system administrator should perform the following four steps:
- create a WebWisdom NT template directory and copy to it all template distribution files,
- compile the template,
- add the template to JavaScript Application Manager and configure the Enterprise Server,
- edit and copy a template configuration file.
The whole installation process must be run on the host where Netscape Enterprise Server is installed.
During the first step, a
WebWisdom NT template directory is created and all template distribution files are copied to it. The template directory should be created in the Enterprise Server Javascript default directory (usually /netscape/suitespot/js), eg.:
|
mkdir /netscape/suitespot/js/WisdomNT |
During the second step, the template is compiled by the use of build3.bat file. Before compilation proper path to
WebWisdom NT configuration file should be set. To perform this, the system administrator should edit the file defaults.js. Second line of this file should be altered as follows:
|
configFile = new File ("/netscape/suitespot/https-enterprise_server_name/config/wisdomnt.conf"); |
where https-enterprise_server_name/config is the default directory with configuration files for the Netscape Enterprise Server.
Next, proper path to the JavaScript compiler (jsac) should be set in the configuration file, e.g.,
|
/netscape/suitespot/bin/https/jsac -f filelist -v -o WisdomNT.web |
Next, the file should be run to perform the compilation. As a result of successful compilation file named WisdomNT.web should be created.
In the third step, the template is added to JavaScript Application Manager and Netscape Enterprise Server is re-configured. To complete this step, the system administrator should run Netscape Administration Server administration page and set:
Programs
Server Javascript
Activate the Server Side Javascript application environment? è
Yes
Require administration server password for Server Side Javascript application environment? è
Yes
To apply changes "OK", and then "Save and Apply" buttons should be pressed.
Next, the Application Manager should be run using link displayed in the middle of the administration page or directly from the HTML browser using the following URL:
|
http://enterprise_server_name/appmgr |
To add the template, JavaScript Application Manager is used. Its sample page is shown in Fig. 8.1. The system administrator should press "Add Application" button and fill-in the form. Form fields have the following meaning:
- Name - application name, should be set to "WisdomNT";
- Web File Path - full path to file WisdomNT.web, e.g., „/netscape/suitespot/js/WisdomNT/WisdomNT.web";
- Default Page - a file to be sent to a client who does not indicate a specific page for the application; this page is analogous to index.html for a standard URL. For
Web Wisdom NT it should be set to "LoginPage.html";
Initial Page - the page to run when the application is first started; this page is run only once during application life and it is used to initialize values and establish database connections; this field is optional; for Web Wisdom NT it could be set to "LoginPage.html" as the previous field;
Built-in maximum database connections - the maximum number of database connections that this application can serve at once if one is using any built-in database object. This field should be set to „3".
Fig. 8.1. Adding a template to Netscape Enterprise Server
To finish the form fill-up, button "OK" should be pressed. After the application name has been added to the "Applications" list (displayed in the left-upper part of the page), the administrator should start
Web Wisdom NT by "Start" link. After starting, a status for the application should be changed to "Active".
In the fourth step of the installation process, a template configuration file is created and edited. The configuration file for the template wisdomnt.conf should be copied to the Enterprise Server configuration directory (cf. step 2.), e.g. „/netscape/suitespot/https-server_name/config". Next, database connection parameters should be set. In the first line Oracle database user name must be set. In the second line, Oracle database user password must be set. And finally, in the third line Oracle database connection string must be set. An example of the configuration file is shown below:
|
wisdomuser
dbpass12
ORACLEDB
|
If a given parameter is an empty string, empty line should be entered in its place.
The entire installation process described above can be performed automatically using the Netscape Visual Java Script Environment. In such case the new project should be set up and proper deployment parameters should be entered (see user’s manual for details).
8.2. Application Programming Interface API for the Exporter
This chapter is devoted to a library of functions which are used to define users’ templates. A template is a way to export data (i.e., foils of presentations in both text and graphic form, applets, images, etc.) from the database and display them by the use of any HTML browser (i.e., Netscape Communicator, Microsoft Internet Explorer). From a technical point of view, the template API library is used as a set of server-side JavaScript functions. Each function in the API library is described in the following way:
|
function function_name (formal_parameters)
input:
name - /type/ description
output:
/type/ description
The detailed description of the function. |
Functions are grouped in the following sections:
- object declarations (i.e., functions which declare objects used by other functions),
- property retrieval functions,
- authorization functions,
- image manipulation functions,
- foilworld manipulation functions,
- presentation manipulation functions,
- font manipulation functions,
- help manipulation functions,
- state preservation functions,
- other functions.
In the remaining section of this chapter the above function groups are presented and its using is described.
8.2.1. Object declarations
|
//OBJECT
function imageObject(TITLE, IID)
input:
TITLE - /string/ image name
IID - /number/ image ID
output:
/imageObject/ image object
Image object is used for storing an identifier and a title for an image to be retrieved from the database. |
Presentation array object is used by foil retrieving functions to store a handle to a simple presentation containing one educational object.
|
//OBJECT
function imageDimensionsObject (HOR, VER)
input:
HOR - /number/ horizontal dimension (width)
VER - /number/ vertical dimension (height)
output:
/imageDimensionsObject/ dimensions object
Dimensions object is used for an image to store information about dimension of a sub-window with the image. |
8.2.2. Property retrieval functions
|
function getColorPropU (propName, userID)
input:
propName - /string/ name of the property
userID - /number/ user ID
output:
/string/ color value
This function returns a color value of a given color property set in the database as default value for a given user. |
|
function getImagePropU (propName, userID)
input:
propName - /string/ name of the property
userID - /number/ user ID
output:
/string/ image name
This function returns an image name of a given image property set in the database as default value for a given user. |
|
function getColorPropUPF (propName, userID, PID, FID)
input:
propName - /string/ name of the property
userID - /number/ user ID
PID - /number/ presentation ID
FID - /number/ foil ID
output:
/string/ color value
This function returns a color value of a given color property set in the database. The order of finding a value of the property is the following: try to find a value for educational object (foil) property; if not defined, try for a presentation the foil belongs to; if not defined, try for a given user. |
|
function getImagePropUPF (propName, userID, PID, FID)
input:
propName - /string/ name of the property
userID - /number/ user ID
PID - /number/ presentation ID
FID - /number/ foil ID
output:
/string/ image name
This function returns an image name of a given image property set in the database. The order of finding a value of the property is the following: try to find a value for educational object (foil) property; if not defined, try for a presentation the foil belongs to; if not defined, try for a given user. |
|
function getColorPropUP (propName, userID, PID)
input:
propName - /string/ name of the property
userID - /number/ user ID
PID - /number/ presentation ID
output:
/string/ color value
This function returns a color value of a given color property set in the database. The order of finding a value of the property is the following: try to find a value for a presentation; if not defined, try for a given user. |
|
function getNumericGeneralPropUPF (propName, userID, PID, FID)
input:
propName - /string/ name of the property
userID - /number/ user identifier
PID - /number/ presentation ID
FID - /number/ educational object identifier
output:
/number/ property value
This function returns a numeric property value of a given general property in the database. The order of finding a value of the property is the following: try to find a value for educational object (foil) property; if not defined, try for a presentation the foil belongs to; if not defined, try for a given user. |
|
function getCharacterGeneralPropUPF (propName, userID, PID, FID)
input:
propName - /string/ name of the property
userID - /number/ user identifier
PID - /number/ presentation ID
FID - /number/ educational object identifier
output:
/string/ property value
This function returns a character property value of a given general property in the database. The order of finding a value of the property is the following: try to find a value for educational object (foil) property; if not defined, try for a presentation the foil belongs to; if not defined, try for a given user. |
|
function getNumericGeneralPropU (propName, userID)
input:
propName - /string/ name of the property
userID - /number/ user identifier
output:
/number/ property value
This function returns a numeric property value of a given user-defined general property in the database. |
|
function getCharacterGeneralPropU (propName, userID)
input:
propName - /string/ name of the property
userID - /number/ user identifier
output:
/string/ property value
This function returns a character property value of a given user-defined general property in the database. |
8.2.3. Authorization functions
|
function checkAuthorization (usid, passwd)
input:
usid - /number/ user id
passwd - /string/ use password
output:
/string/ string
Possible output values are:
noUser - no user found in the database
authOK – authorization passed
badPasswd - wrong password
This function performs user authorization. |
|
function userHasSourceRights (userID, eSourceSid)
input:
userID - /number/ user ID
eSourceSID - /number/ source ID
output:
/boolean/ logical value
This function checks if a given user has rights to retrieve presentation source (i.e., PowerPoint file) from the database. |
|
function getUserLoginName (USID)
input:
USID - /number/ user ID
output:
/string/ user’s login name
This function gets from the database user’s log-in name. |
|
function user_has_read_access_to_foilworld (usid, wid)
input:
usid - userID
wid - foilworld ID
output:
/boolean/ logical value
This function checks if a given user has read access granted to a foilworld. |
8.2.4. Image manipulation functions
|
function getImageSource (propertyName, userID)
input:
propertyName - /string/ name of the property
userID - /number/ user ID
output:
/string/ image string for <IMG> SRC attribute
This function reads a string from the database from user’s image properties. The string is used to set „SRC"-like attributes for any HTML tag which uses an image as a background, a button, etc. |
|
function makeImageTag (propertyName, userID)
input:
propName - /string/ name of the property
userID - /number/ user ID
output:
/void/ none
This function creates complete <IMG> HTML tag based on a given user’s image property from the database. |
|
function getFoilImageSource (propertyName, userID, parentPID, foilPID)
input:
propertyName - /string/ name of the property
userID - /number/ user ID
parentPID - /number/ presentation ID
foilPID - /number/ foil ID
output:
/string/ image string for <IMG> SRC attribute
This function reads a string from the database from image properties. The string is used to set „SRC"-like attributes for any HTML tag which uses an image as a background, a button, etc. The order of finding a value of the property is the following: try to find a value for educational object (foil) property; if not defined, try for a presentation the foil belongs to; if not defined, try for a given user. |
|
function makeFoilImageTag (propertyName, userID, parentPID, foilPID)
input:
propertyName - /string/ name of the property
userID - /number/ user ID
parentPID - /number/ presentation ID
foilPID - /number/ foil ID
output:
/void/ none
This function creates complete <IMG> HTML tag based on a given image property from the database. The order of finding a value of the property is the following: try to find a value for educational object (foil) property; if not defined, try for a presentation the foil belongs to; if not defined, try for a given user. |
|
function getHorizontalImageSize (foilPID, presentationPID, userID)
input:
foilPID - /number/ foil ID
presentationPID - /number/ presentation ID
userID - /number/ user ID
output:
/number/ horizontal image size
This function reads from the database horizontal image size for a given foil. The order of finding a value of the image size is the following: try to find a value for educational object (foil) property; if not defined, try for a presentation the foil belongs to; if not defined, try for a given user. |
This function reads from the database vertical image size for a given foil. The order of finding a value of the image size is the following: try to find a value for educational object (foil) property; if not defined, try for a presentation the foil belongs to; if not defined, try for a given user.
|
function getImageSize (style, foilPID, presentationPID, userID)
input:
style - /string/ dimension specification: "HORIZONTAL" | "VERTICAL"
foilPID - /number/ foil ID
presentationPID - /number/ presentation ID
userID - /number/ user ID
output:
/number/ horizontal or vertical image size
This function reads from the database horizontal or vertical image size for a given foil. The order of finding a value of the image size is the following: try to find a value for educational object (foil) property; if not defined, try for a presentation the foil belongs to; if not defined, try for a given user. |
|
function getImageDimensions (foilPID, presentationPID, userID)
input:
foilPID - /number/ foil ID
presentationPID - /number/ presentation ID
userID - /number/ user ID
output:
/imageDimensionsObject/ dimension object containing image sizes
This function reads from the database both horizontal and vertical image sizes for a given foil. The order of finding a value of the image size is the following: try to find a value for educational object (foil) property; if not defined, try for a presentation the foil belongs to; if not defined, try for a given user. |
8.2.5. Foilworld manipulation functions
|
function fwContainsPres(fwID)
input:
fwID - /number/ foilworld ID
output:
/boolean/ logical value
This function checks if a given foilworld is not empty, i.e., if it contains any presentation. |
8.2.6. Presentation manipulation functions
|
function presContainsAddon(PID)
input:
PID - /number/ presentation ID
output:
/boolean/ logical value
This function checks if a given presentation contains any add-on. |
|
function pictureInFoil(PID)
input:
PID - /number/ presentation ID
output:
/boolean/ logical value
This function checks if an image form for a given (one foil long) presentation exists. |
|
function getSignature (PID, parentPID, userID)
input:
PID - /number/ foil ID
parentPID - /number/ presentationPID
userID - /number/ user ID
output:
/string/ foil signature
This function gets from the database a signature. The order of finding a value of the signature is the following: try to find a value for educational object (foil) property; if not defined, try for a presentation the foil belongs to; if not defined, try for a given user. |
|
function getEduobjectEID (foilPID)
input:
foilPID - /number/ foil ID
output:
/number/ educational object EID
This function gets educational object identifier EID for a given presentation (one foil long). |
|
function getPresentationAuthor (PID)
input:
PID - /number/ presentation ID
output:
/string/ author name
This function gets from the database a name of an author of the presentation. |
|
function getPresentationTitle (PID)
input:
PID - /number/ presentation ID
output:
/string/ title of the presentation
This function gets from the database a title of the presentation. |
|
function getNumberofFoils (parentPID)
input:
parentPID - /number/ presentation ID
output:
/number/ number of foils
This function gets number of foils contained by a given presentation. |
|
function presContainsSound (PID)
input:
PID - /number/ presentation ID
output:
/boolean/ logical value
This function checks if a given presentation contains any sound data. |
|
function getPIDforEduobject (EID)
input:
EID - /number/ eduobject ID
output:
/number/ presentation PID
This function gets presentation identifier PID for a given educational object. |
|
function getPresPosition (PID, parentPID)
input:
PID - /number/ presentation ID
parentPID - /number/ parent presentation ID
output:
/number/ presentation position
This function gets a position (i.e., number of current foil or sub-presentation) of a presentation within its parent presentation. |
|
function isPresContainedbyPres (PID)
input:
PID - /number/ presentation ID
output:
/boolean/ logical value
This function checks if a given presentation is used as a part of another presentation. |
|
function isPresEmpty (PID)
input:
PID - /number/ presentation ID
output:
/boolean/ logical value
This function checks if a given presentation is empty, i.e. it does not contain any foils and/or sub-presentations. |
|
function getParentPID (PID)
input:
PID - /number/ presentation ID
output:
/number/ number of presentations found
This function counts presentations which all contain (i.e., share) a given presentation. |
|
function getParentFWID (PID)
input:
PID - /number/ presentation ID
output:
/number/ number of foilworlds found
This function counts foilworlds which all contain (i.e., share) a given presentation. |
8.2.7. Font manipulation functions
|
function getGlobalTitleFontSize (foilPID, presentationPID, userID)
input:
foilPID - /number/ foil ID
presentationPID - /number/ presentation ID
userID - /number/ user ID
output:
/number/ title font size
This function gets title font size. The order of finding a value of the font size is the following: try to find a value for educational object (foil) property; if not defined, try for a presentation the foil belongs to; if not defined, try for a given user. |
|
function getGlobalFontSize (foilPID, presentationPID, userID)
input:
foilPID - /number/ foil ID
presentationPID - /number/ presentation ID
userID - /number/ user ID
output:
/number/ text font size
This function gets text font size. The order of finding a value of the font size is the following: try to find a value for educational object (foil) property; if not defined, try for a presentation the foil belongs to; if not defined, try for a given user. |
8.2.8. Help manipulation functions
|
function getHelpImage (imageName, imageWidth, imageHeight)
input:
imageName - /string/ name of the image
imageWidth - /number/ width of the image
imageHeight - /number/ height of the image
output:
/void/ none
This function creates <IMG> HTML tag to retrieve a help image from the database and display it in a given size. |
|
function printHelpText (helpID)
input:
helpID - /string/ help topic ID
output:
/void/ none
This function writes text of a given help topic. Help topics are created automatically by the help compiler on the bade of this documentation, thus help topics are identified by numbers of chapters and sections in this document with dots changed to underscore characters. For example, help topic „5_1_" identifies chapter 5.1. |
|
function getHelpAnchor (helpID)
input:
helpID - /string/ help topic ID
output:
/string/ help anchor
This function gets an anchor in a help text to a given help topic. |
|
function getHelpTitle (helpID)
input:
helpID - /string/ help topic ID
output:
/string/ help title
This function gets a title of a given help topic. |
|
function isHelpTopic (helpID)
input:
helpID - /string/ help topic ID
output:
/boolean/ logical value
This function checks if a given help topic exists. |
8.2.9. State preservation functions
|
function pass (elementName, elementValue)
input:
elementName - /string/ the name of the request property
elementValue – /string/ value of the property
output:
/void/ none
This function sets <INPUT TYPE=HIDDEN> HTML 'hidden' element on the page for request object |
|
function readValues ()
input:
none
output:
/void/ none
This function gets an identifier of a user who is currently logged-in to the database. |
|
function writeRequestValues ()
input:
none
output:
/void/ none
This function sets an identifier of a user who is currently logged-in to the database. |
8.2.10. Other functions
|
function getSourceMimeType (eSourceSid)
input:
eSourceSID - /number/ source ID
output:
/string/ MIME-type name
This function gets MIME type for source object, mainly PowerPoint presentation. |
|
function getMimeType (MID)
input:
MID - /number/ mime-type ID
output:
/string/ MIME-type name
This function gets from the database MIME-type name for a given MIME type. |
This function performs an SQL query in the database, thus enabling to retrieve any tuple from any database table.
|
function isHidden (parentPID, childPID)
input:
parentPID - /number/ parent presentation ID
childPID - /number/ child presentation ID
output:
/boolean/ logical value
This function checks if a given presentation belonging to its parent presentation is hidden. |
8.3. Database schema
All tables of the WebWisdom database schema are listed below in the alphabetical order. For every attribute, its name, type, options (mandatory/optional, auto-initialized to value), and meaning is described. Attributes with names ended by "id" are identifiers (i.e., primary and foreign keys). The database schema is presented in a graphical form in the Appendix A - Database Schema.
Table access_to_foilworld
By this table one can store an information about user access rights to foilwords.
|
Attribute name |
Attribute type |
Attribute options |
Attribute meaning |
|
access_mode |
string[5] |
mandatory, initialized to an empty string |
read ("r"), write ("w"), or read/write ("rw") user access to a foilword |
|
foilworld_wid |
integer[0..9999999999] |
mandatory |
foilword identifier |
|
user_uid |
integer[0..9999] |
mandatory |
user identifier |
Table access_to_source
By this table one can store an information about user access rights to source (i.e., PowerPoint) files.
|
Attribute name |
Attribute type |
Attribute options |
Attribute meaning |
|
access_mode |
string[5] |
mandatory |
read ("r"), write ("w"), or read/write ("rw") user access to a source file |
|
source_sid |
integer[0..9999999999] |
mandatory |
source file identifier |
|
user_uid |
integer[0..9999] |
mandatory |
user identifier |
Table addon
In this table the information is stored about add-ons. The add-ons may be related either to a presentation, or to one (or more) of its foils.
|
Attribute name |
Attribute type |
Attribute options |
Attribute meaning |
|
aid |
integer[0..9999999999] |
mandatory |
add-on identifier |
|
author_uid |
integer[0..9999] |
mandatory |
user identifier of a user who created the add-on |
|
creation_date |
date |
mandatory |
a date of a creation of the add-on |
|
title |
string[1024] |
mandatory |
title of the add-on |
|
url |
string[1024] |
mandatory |
address of an object pointed by the add-on in URL form |
|
version_date |
date |
mandatory |
a date of last modification of the add-on |
|
expiration_date |
date |
optional |
a date the add-on should not be used anymore |
|
platform |
string[256] |
optional |
platform (i.e., required hardware and software) description |
|
window_attr |
string[1024] |
optional |
attributes of a window the add-on is going to be displayed in |
Table addons
By this table one can store an information about mutual relations among add-ons and presentations or foils.
|
Attribute name |
Attribute type |
Attribute options |
Attribute meaning |
|
addon_aid |
integer[0..9999999999] |
mandatory |
add-on identifier |
|
presentation_pid |
integer[0..9999999999] |
mandatory |
presentation identifier |
|
pres_mode |
integer[0..99] |
mandatory |
a way the add-on is executed:
"automatic" - the add-on window is started together with displaying a foil (presentation)
"manual" - the add-on window is started manually by a user |
Table applet
In this table applet definitions are stored.
|
Attribute name |
Attribute type |
Attribute options |
Attribute meaning |
|
apid |
integer[0..9999999999] |
mandatory |
applet identifier |
|
applet_code |
Binary Large OBject |
mandatory |
a Java program being the applet |
|
java_version |
integer[0..9999] |
optional |
a version of Java compiler which was used to compile the applet |
Table color
In this table information about colors is defined. The colors are used by the exporter (i.e., the templates).
|
Attribute name |
Attribute type |
Attribute options |
Attribute meaning |
|
cid |
integer[0..99999] |
mandatory |
color identifier |
|
color_name |
string[256] |
mandatory |
a name of the color |
|
color_value |
string[7] |
mandatory |
RGB value of the color in the form #RRGGBB |
Table color_property
In this table user-defined properties are defined. The values of the properties are color names.
|
Attribute name |
Attribute type |
Attribute options |
Attribute meaning |
|
active |
integer[0..9] |
mandatory, initialized to 1 |
0 means the property is not visible in the list of properties (i.e., it cannot be modified by users) |
|
def_value_cid |
integer[0..99999] |
mandatory |
color identifier from color table |
|
display_name |
string[256] |
mandatory |
a text which is displayed in user-, presentation-, and foil-attribute windows |
|
prid |
integer[0..9999] |
mandatory |
color property identifier |
|
search_name |
string[256] |
mandatory |
short name used by templates to search for the property |
Table edublob
This table has been developed for some technical reasons (to deal with more than one ORACLE long raw data in one table) and should be treated as a part of eduobject table described below. In this table Binary Large Objects BLOBs are stored which are related to educational objects from eduobject table.
|
Attribute name |
Attribute type |
Attribute options |
Attribute meaning |
|
data |
Binary Large OBject |
mandatory |
BLOB with data (e.g., bytes of an image) |
|
eid |
integer[0..9999999999] |
mandatory |
educational object identifier |
Table eduobject
In this table information about educational objects is stored. An educational object is usually a foil of a presentation, but it also could be an applet, a picture, video stream, etc.
|
Attribute name |
Attribute type |
Attribute options |
Attribute meaning |
|
sound_snid |
integer[0..999999999] |
optional |
sound identifier, if any sound is associated to the educational object |
|
author_uid |
integer[0..9999] |
mandatory |
user identifier of a user who stored the educational object |
|
data_size |
integer[0..999999999] |
mandatory |
size of BLOB data in bytes |
|
disp_mode |
integer[0..99] |
mandatory |
differences between a text and an image form of a foil: essential means an image form cannot be avoided, useful means an image form could be avoided, but some information is lost, asHTML means text and image forms carry the same information |
|
eid |
integer[0..9999999999] |
mandatory |
educational object identifier |
|
html_file_body |
LONG |
mandatory |
a part of text form of the education object, from <BODY> to </BODY> HTML tag |
|
html_file_title |
string[2000] |
mandatory |
a title of text form of the educational object |
|
mime_type_mid |
integer[0..9999] |
mandatory |
identifier of a MIME type of BLOB data |
|
native_image_height |
integer[0..9999] |
mandatory |
height of an image (sub-window) represented by BLOB data |
|
native_image_width |
integer[0..9999] |
mandatory |
width of an image (sub-window) represented by BLOB data |
|
foil_number |
integer[0..9999] |
optional |
a number of a foil being a source of the educational object in a source (i.e., PowerPoint) file |
|
html_file_head |
string[2000] |
optional |
a part of text form of the education object, from <HEAD> to </HEAD> HTML tag |
|
platform |
string[256] |
optional |
platform (i.e., required hardware and software) description |
|
source_sid |
integer[0..9999999999] |
optional |
source identifier, if a source is available for the educational object |
|
text_file |
string[2000] |
optional |
pure text being an unformatted version of HTML text form of the educational object |
Table edu_contain_applet
In this table an information is stored about relations among educational objects and applets.
|
Attribute name |
Attribute type |
Attribute options |
Attribute meaning |
|
applet_apid |
integer[0..9999999999] |
mandatory |
applet identifier |
|
edu_eid |
integer[0..9999999999] |
mandatory |
educational object identifier |
|
parameters |
string[2000] |
optional |
applet parameters |
Table foilworld
In this table information about foilworlds is stored.
|
Attribute name |
Attribute type |
Attribute options |
Attribute meaning |
|
author_uid |
integer[0..9999] |
mandatory |
user identifier of the owner of the foilworld |
|
belongs_to_wid |
integer[0..9999] |
mandatory |
identifier of a parent foilworld |
|
creation_date |
date |
mandatory |
date of the creation of the foilworld |
|
title |
string[1024] |
mandatory |
title of the foilworld |
|
version_date |
date |
mandatory |
date of last modification of the foilworld |
|
wid |
integer[0..9999999999] |
mandatory |
foilworld identifier |
|
buffer_owner_uid |
integer[0..9999] |
optional |
NULL means the foilword is a regular one; NOT NULL identifies an owner of a stage represented by this foilworld |
|
expiration_date |
date |
optional |
date the foilworld should not be used anymore |
|
steward_uid |
integer[0..9999] |
optional |
user identifier of a user who is responsible the foilworld |
|
user_support_uid |
integer[0..9999] |
optional |
user identifier of a user who can give some additional information about the foilworld |
Table fw_contain_pr
In this table information about presentations belonging to foilwords is stored.
|
Attribute name |
Attribute type |
Attribute options |
Attribute meaning |
|
component_pid |
integer[0..9999999999] |
mandatory |
presentation identifier |
|
container_wid |
integer[0..9999999999] |
mandatory |
foilworld identifier |
Table general_property
In this table information about general properties is stored.
|
Attribute name |
Attribute type |
Attribute options |
Attribute meaning |
|
active |
integer[0..9] |
mandatory, initialized to 1 |
0 means the property is not visible in the list of properties (i.e., it cannot be modified) |
|
display_name |
string[256] |
mandatory |
a text which is displayed in user-, presentation-, and foil-attribute windows |
|
prid |
integer[0..9999] |
mandatory |
property identifier |
|
search_name |
string[256] |
mandatory |
short name used by templates to search for the property |
|
def_value_char |
string[2000] |
optional |
string-based value of the property, if any |
|
def_value_num |
integer[0..9999999999] |
optional |
numeric value of the property, if any |
Table help
In this table anchors to help file(s) are stored. These anchors are used to find a help file and a point in the help file from which the help text is displayed just after pressing a given "Help" button.
|
Attribute name |
Attribute type |
Attribute options |
Attribute meaning |
|
help_text_htid |
integer[0..9999] |
mandatory |
help file identifier |
|
hid |
integer[0..9999] |
mandatory |
help identifier – used with help buttons |
|
help_title |
string[1024] |
mandatory |
help title |
|
help_level |
integer[0..99] |
mandatory |
indentation of help paragraph in table of contents, e.g., 0 – table of contents, 1 – main chapter, 2 – sub-chapter, etc. |
|
help_text_anchor |
string[256] |
optional |
a name of the anchor inside help file |
Table help_image
In this table images used to display help are stored. These images are automatically read and inserted into help text while help window is displayed.
|
Attribute name |
Attribute type |
Attribute options |
Attribute meaning |
|
data |
Binary Large OBject |
mandatory |
bytes of the image |
|
name |
string[256] |
mandatory |
a name of the image |
Table help_text
In this table help text files are stored in HTML form.
|
Attribute name |
Attribute type |
Attribute options |
Attribute meaning |
|
help_text |
LONG |
mandatory |
bytes (i.e., characters) of the text in HTML format |
|
htid |
integer[0..9999] |
mandatory |
help text identifier |
Table image
In this table "technical" images are stored which may be used as backgrounds, buttons, icons, etc. by the exporter (i.e., a template) and the Presentation/Foilword Manager.
|
Attribute name |
Attribute type |
Attribute options |
Attribute meaning |
|
data |
Binary Large OBject |
mandatory |
bytes of the image in a given format |
|
data_size |
integer[0..999999999] |
mandatory |
number of bytes of the image |
|
iid |
integer[0..9999999999] |
mandatory |
image identifier |
|
image_name |
string[256] |
mandatory |
a name of the image |
|
mime_type_mid |
integer[0..9999] |
mandatory |
MIME type of the image |
|
native_image_height |
integer[0..9999] |
mandatory |
non-scaled height of the image |
|
native_image_width |
integer[0..9999] |
mandatory |
non-scaled width of the image |
Table image_property
In this table information is stored about image properties.
|
Attribute name |
Attribute type |
Attribute options |
Attribute meaning |
|
active |
integer[0..9] |
mandatory, initialized to 1 |
0 means the property is not visible in the list of properties (i.e., it cannot be modified) |
|
def_value_iid |
integer[0..9999999999] |
mandatory |
image property identifier |
|
display_name |
string[256] |
mandatory |
a text which is displayed in user-, presentation-, and foil-attribute windows |
|
prid |
integer[0..9999] |
mandatory |
property identifier |
|
search_name |
string[256] |
mandatory |
short name used by templates to search for the property |
Table mime_type
In this table a list of MIME types used by the database is stored.
|
Attribute name |
Attribute type |
Attribute options |
Attribute meaning |
|
mid |
integer[0..9999] |
mandatory |
MIME type identifier |
|
mime_type_name |
string[256] |
mandatory |
MIME type name |
Table presentation
In this table information about presentations is stored. Presentations may be either composite (i.e., composed of a list of presentations), or one-foil long. In the latter case, a presentation contains one and only one educational object (e.g., an applet, a foil, etc.).
|
Attribute name |
Attribute type |
Attribute options |
Attribute meaning |
|
author_uid |
integer[0..9999] |
mandatory |
identifier of an owner of the presentation |
|
creation_date |
date |
mandatory |
date of the creation of the presentation |
|
hor_image_size |
integer[0..9999] |
mandatory |
fixed width of an image related to a foil of the presentation |
|
hor_image_style |
integer[0..99] |
mandatory |
style an image related to a foil is displayed: native (an image is displayed in its original size), minimum (an image is displayed not smaller than fixed width), maximum (an image is displayed not bigger than fixed width), and parmvalue (an image is displayed in fixed width) |
|
interactivity |
integer[0..99] |
mandatory, initialized to 1 |
a level of interactivity between a presentation and a user: low, medium, or high |
|
learning_level |
string[256] |
mandatory, initialized to '0:0' |
a pair "age:skill" describing a level of the presentation, e.g. "15:0", "18:3"; age is in range 0..99, while skill - 0..5; the pair "0.0" means the learning level is undefined |
|
pid |
integer[0..9999999999] |
mandatory |
presentation identifier |
|
presentation |
string[256] |
mandatory |
the way the presentation is presented to users: a course, a tutorial, an example, etc. |
|
pres_form_fid |
integer[0..9999] |
mandatory |
identifier of a form of the presentation |
|
subject |
string[1024] |
mandatory |
user-defined subject of the presentation, i.e. mathematics, physics, computer science, networks, etc. |
|
title |
string[1024] |
mandatory |
title of the presentation |
|
use_time |
integer[0..999999999] |
mandatory, initialized to 0 |
optimal time period which should be spent to present all foils of the presentation or this foils particular foil if a presentation represents a foil |
|
version_date |
date |
mandatory |
date of the last modification of the presentation |
|
ver_image_size |
integer[0..9999] |
mandatory |
fixed height of an image related to a foil of the presentation |
|
ver_image_style |
integer[0..99] |
mandatory |
style an image related to a foil is displayed: native (an image is displayed in its original size), minimum (an image is displayed not smaller than fixed height), maximum (an image is displayed not greater than fixed height), and parmvalue (an image is displayed in fixed height) |
|
abstract_pid |
integer[0..9999999999] |
optional |
abstract identifier, if any |
|
edu_eid |
integer[0..9999999999] |
optional |
educational object identifier, if any |
|
expiration_date |
date |
optional |
date the presentation should not be used anymore |
|
fontsize |
integer[0..99] |
optional |
size of a font a text from foils is displayed |
|
intable_fontsize |
integer[0..99] |
optional |
size of a font a table from foils is displayed |
|
intable_title_fontsize |
integer[0..99] |
optional |
size of a font a title from foils containing tables is displayed |
|
keywords |
string[1024] |
optional |
a few user-defined words describing a contents of the presentation |
|
prerequisites |
string[1024] |
optional |
what a user should know to understand the presentation |
|
signature |
string[2000] |
optional |
author’s or presenter’s signature - a short text which will be displayed by the exporter while foils of the presentation are displayed (may be formatted HTML) |
|
steward_uid |
integer[0..9999] |
optional |
identifier of a user who is responsible for the presentation |
|
title_fontsize |
integer[0..99] |
optional |
size of a font a title is displayed |
|
user_support_uid |
integer[0..9999] |
optional |
identifier of a user who can give some additional information about the presentation |
Table pres_color_property
In this table information about color properties for presentations is stored.
|
Attribute name |
Attribute type |
Attribute options |
Attribute meaning |
|
color_cid |
integer[0..99999] |
Mandatory |
color identifier |
|
color_prop_prid |
integer[0..9999] |
Mandatory |
color property identifier |
|
pres_pid |
integer[0..9999999999] |
Mandatory |
presentation identifier the color property is used in |
Table pres_form
In this table information is stored about possible types of presentations.
|
Attribute name |
Attribute type |
Attribute options |
Attribute meaning |
|
fid |
integer[0..9999] |
Mandatory |
presentation form identifier |
|
pres_form_name |
string[256] |
Mandatory |
text being a name of the presentation form, e.g. lecture, presentation, example, interactive course, photos, etc. |
Table pres_general_property
In this table information about general properties for presentations is stored.
|
Attribute name |
Attribute type |
Attribute options |
Attribute meaning |
|
gen_prop_prid |
integer[0..9999] |
Mandatory |
general property identifier |
|
pres_pid |
integer[0..9999999999] |
Mandatory |
presentation identifier |
|
value_char |
string[2000] |
Optional |
string-based value of the property, if any |
|
value_num |
integer[0..9999999999] |
Optional |
numeric value of the property, if any |
Table pres_image_property
In this table information about image properties for presentations is stored.
|
Attribute name |
Attribute type |
Attribute options |
Attribute meaning |
|
image_iid |
integer[0..9999999999] |
Mandatory |
image identifier |
|
image_prop_prid |
integer[0..9999] |
Mandatory |
image property identifier |
|
pres_pid |
integer[0..9999999999] |
Mandatory |
presentation identifier |
Table sound
In this table information is stored about sounds associated with presentations and foils.
|
Attribute name |
Attribute type |
Attribute options |
Attribute meaning |
|
data |
Binary Large OBject |
mandatory |
bytes representing digitized sound |
|
mime_type_mid |
integer[0..9999] |
mandatory |
MIME type of the sound |
|
snid |
integer[0..999999999] |
mandatory |
sound identifier |
Table source
In this table source (i.e., PowerPoint) files are stored.
|
Attribute name |
Attribute type |
Attribute options |
Attribute meaning |
|
author_uid |
integer[0..9999] |
mandatory |
identifier of the owner of the source |
|
creation_date |
Date |
mandatory |
date of creation of the source |
|
data |
Binary Large Object |
mandatory |
bytes representing the source (i.e., PowerPoint file) |
|
data_size |
integer[0..999999999] |
mandatory |
number of bytes representing the source |
|
mime_type_mid |
integer[0..9999] |
mandatory |
MIME type of the source |
|
sid |
integer[0..9999999999] |
mandatory |
source identifier |
|
title |
string[1024] |
mandatory |
title of the source |
|
version_date |
date |
mandatory |
date of the last modification of the source |
|
expiration_date |
date |
optional |
date the source should not be used anymore |
|
keywords |
string[1024] |
optional |
a few user-defined words describing the source |
|
platform |
string[256] |
optional |
software and hardware requirements to proceed with the source |
|
steward_uid |
integer[0..9999] |
optional |
identifier of a user who is responsible for the source |
|
subject |
string[1024] |
optional |
a user-defined subject of the presentation, i.e. mathematics, physics, computer science, networks, etc. |
|
user_support_uid |
integer[0..9999] |
optional |
identifier of a user who can give some additional information about the source |
Table subpresentation
In this table information about composition of presentations is stored. Presentations are either one-foil long (such presentations contain one and only one educational object), or composite (such presentations do not contain directly educational objects). One-foil presentations represent foils, composite presentations represent presentations.
|
Attribute name |
Attribute type |
Attribute options |
Attribute meaning |
|
child_pid |
integer[0..9999999999] |
mandatory |
identifier of a "child" presentation |
|
hidden |
integer[0..9] |
mandatory, initialized to 0 |
determines whether the subpresentation is visible in the parent presentation.
0 means the sub-presentation is not hidden; hidden sub-presentations are usually not processed by the exporter (a template) |
|
parent_pid |
integer[0..9999999999] |
mandatory |
identifier of "parent" presentation |
|
position |
integer[0..99999] |
mandatory |
position of the "child" presentation in the list of "parent" components |
Table users
In this table information about user accounts is stored.
|
Attribute name |
Attribute type |
Attribute options |
Attribute meaning |
|
creation_date |
date |
mandatory |
date of introduction of the user account |
|
fontsize |
integer[0..99] |
mandatory, initialized to 6 |
default font size for foils; it is taken into consideration if fontsize is not defined neither to presentation, nor to foil |
|
intable_fontsize |
integer[0..99] |
mandatory, initialized to 6 |
default font size for foils containing tables |
|
intable_title_fontsize |
integer[0..99] |
mandatory, initialized to 6 |
default title font size for foils containing tables |
|
login_name |
string[20] |
mandatory |
name of the account |
|
password |
string[20] |
mandatory |
user-defined password |
|
title_fontsize |
integer[0..99] |
mandatory, initialized to 6 |
default title font size for foils |
|
usid |
integer[0..9999] |
mandatory |
account (i.e., user) identifier |
|
version_date |
date |
mandatory |
date of last modification of the account |
|
expiration_date |
date |
optional |
date the account is not valid anymore |
|
hor_image_size |
integer[0..9999] |
optional, initialized to 569 |
preferred width of images |
|
hor_image_style |
integer[0..99] |
optional |
style an image related to a foil is displayed: native (an image is displayed in its original size), minimum (an image is displayed not smaller than fixed width), maximum (an image is displayed not greater than fixed width), and parmvalue (an image is displayed in fixed width) |
|
signature |
string[2000] |
optional |
author’s signature - a short text which may be displayed by the exporter while foils of the presentation are displayed (may be HTML format) |
|
ver_image_size |
integer[0..9999] |
optional, initialized to 320 |
preferred height of images |
|
ver_image_style |
integer[0..99] |
optional |
style an image related to a foil is displayed: native (an image is displayed in its original size), minimum (an image is displayed not smaller than fixed height), maximum (an image is displayed not greater than fixed height), and parmvalue (an image is displayed in fixed height) |
Table user_color_property
In this table user-defined properties are defined. The values of the properties are color names.
|
Attribute name |
Attribute type |
Attribute options |
Attribute meaning |
|
color_cid |
integer[0..99999] |
mandatory |
color identifier |
|
color_prop_prid |
integer[0..9999] |
mandatory |
color property identifier |
|
user_uid |
integer[0..9999] |
mandatory |
user identifier |
Table user_general_property
In this table information about general properties for users is stored.
|
Attribute name |
Attribute type |
Attribute options |
Attribute meaning |
|
gen_prop_prid |
integer[0..9999] |
mandatory |
user general property identifier |
|
user_uid |
integer[0..9999999999] |
mandatory |
user identifier |
|
value_char |
string[2000] |
optional |
string-based value of the property, if any |
|
value_num |
integer[0..9999999999] |
optional |
numeric value of the property, if any |
Table user_image_property
In this table information about user image properties is stored.
|
Attribute name |
Attribute type |
Attribute options |
Attribute meaning |
|
image_iid |
integer[0..9999999999] |
mandatory |
image identifier |
|
image_prop_prid |
integer[0..9999] |
mandatory |
user image property identifier |
|
user_uid |
integer[0..9999999999] |
mandatory |
user identifier |
Appendix A. Database Schema


 b)
b) 


